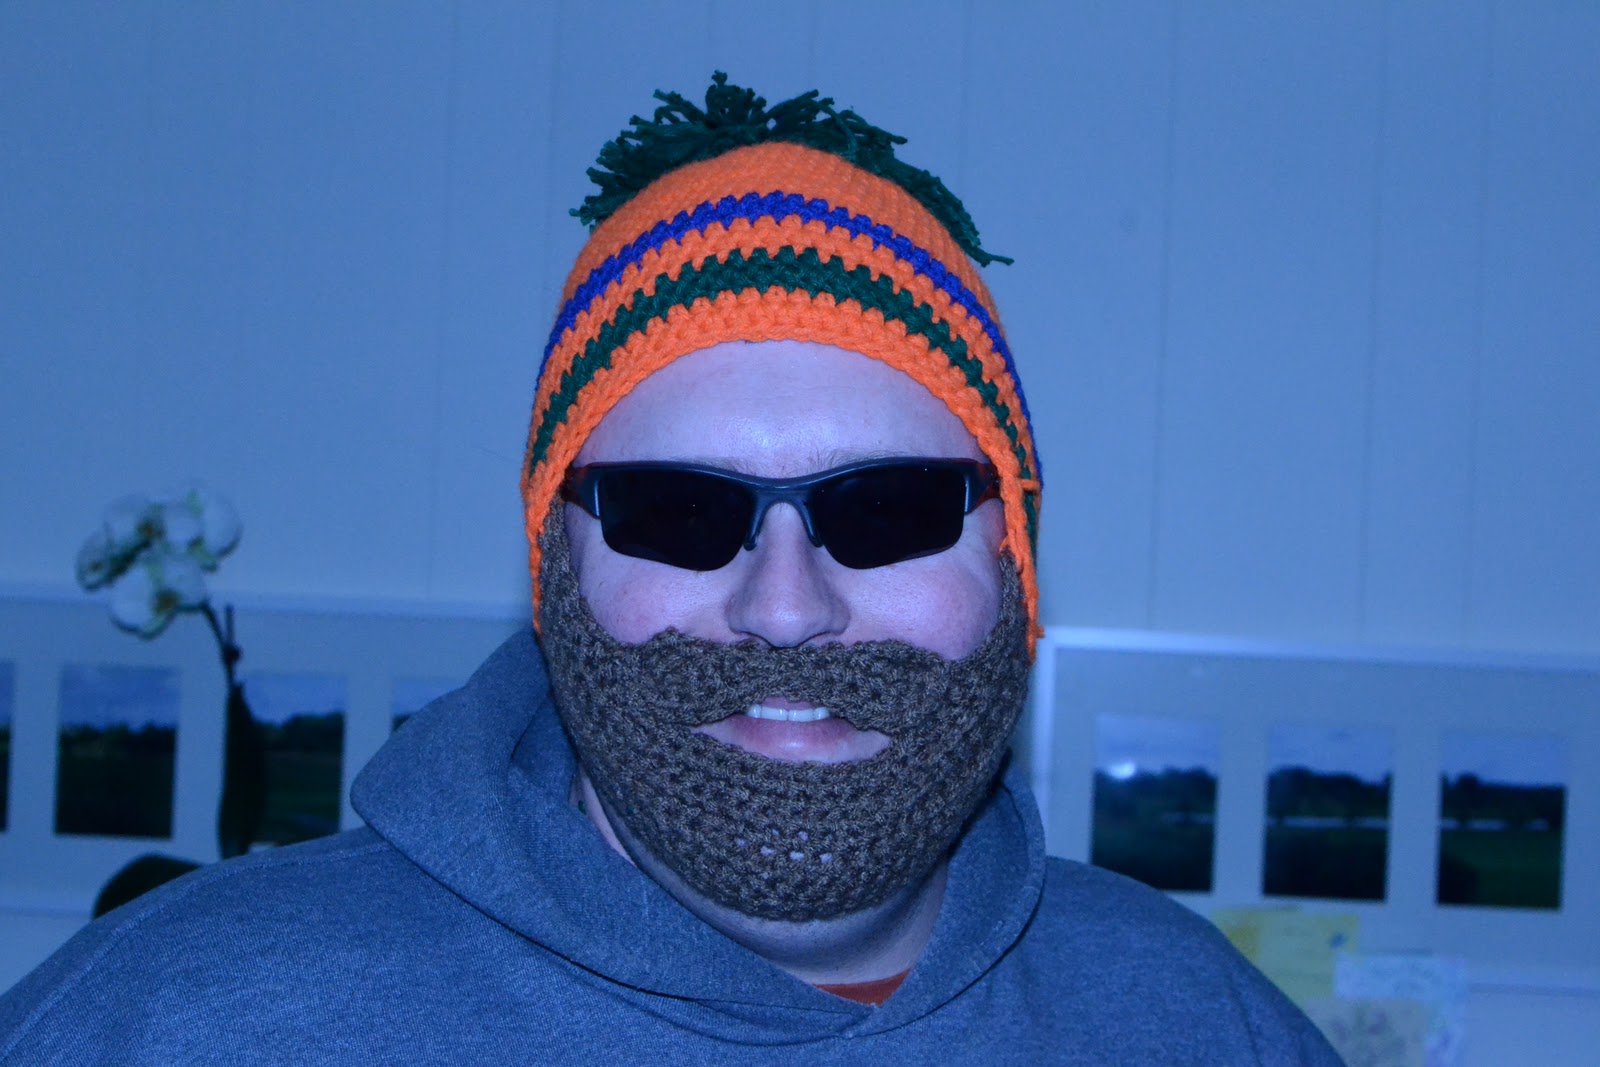
So, I headed into the construction of another beardhat, and I took the opportunity to learn from my adventures with the first BeardHat and I made the "sideburns" a little bit wider. I also made the shaping a little smoother. It should be noted that somehow, the first pattern turned out a little larger, so that may be something you want to consider if you or the person you're making it for has a larger face (whatever that is). The mustache is exactly the same.
Begin with the hat of your choice, setting aside some scraps of the hat color yarn to tack the beard onto the hat.
Yarn: Red Heart Super Saver
Hook: I use a 5mm (Most commenters have had more luck with 6.0 or 6.5)
Gauge: I don't measure this stuff....I tend to stitch loosely, so you Definitely want to consider a 6.5 or 6.0 hook if you know you're a tight stitcher **cough**Donna**cough**
The Beard 2.0:
1. Fsc 28 sts, ch1, turn (you could also just ch 29, skip the 1st ch on the hook and sc 28)
2. Sc in each st across, ch1 + turn
3. Sc in next 10 sts, repeat (2sc in next st, 1 sc in following st) over the next 8 sts, then sc in each of the remaining 10 sts, ch1, turn
4. Sc in each st across, turn
5. Sl st in first 8 sts, sc in next 17 sts, sl st in remaining sts, turn
6. Sl st in first 8 sts, sc in next 5 sts, hdc in the next 7 sts, sc in next 5 sts, sl st in remaining sts, turn
7. Sl st in first 11 sts, sc in next 3 sts, hdc in next 5 sts, sc in next 3 sts, sl st in remaining sts, ch1, turn
8. 2sc in first st, sc in each of the next 7 sts, sl st loosely in next 3 sts, sc in next 10 sts, sl st loosely in next 3 sts, sc in next 7 sts, 2 sc in last st. Ch 1, turn
9. Sc in first 7 sts, sl st loosely in next 4 sts, sc2tog, sc in next 8 sts, sc2tog, sl st loosely in the next 4 sts, sc in last 7 sts, ch 1, turn
10. Sc in first 6 sts, sl st loosely in next 4 sts, sc2tog, sc in next 8 sts, sc2tog, sl st loosely in the next 4 sts, sc in last 6 sts, ch 1, turn
11. Sc in next first 4 sts,hdc innext 4, sc in next st, sl st in next 12 sts, sc in next 1, hdc in next 4 sts, sc in last 4 sts
12. Bind off
The Mustache: (Pictures Added 12/24/12 to help clarify - click photo to enlarge)
1. Ch11, sc in 1st ch from hook, and sc in each st across (10 sts total)
2. Without chaining, sc into the side of the sc you just made, (keep going in the same direction as if working in-the-round, you may have to fudge it) and then into the back of the first 2 base ch sts. (again, you're working in the round for a moment to make a spiral effect) Sl st into the back of the next ch st. turn.
3. Sl st into the top of the sl st you just made. Sc into the next 2 sts. 2 sc into the next st. sc in each of the next 4 sts. Sl st in each of the next 2 sts. Sc in next 4 sts. Sc in the end of the last sc. Sc into the back of the first 2 ch sts. Sl st into the back of the next ch st. turn.
4. Sl st into the top of the sl st you just made. Sc into the next 2 sts. 2 sc into the next st. Continue on with a sc in each of the next 4 sts. Sl st in each of the next 2 sts. Sc in each of the next 4 sts. Sl st into next st. fasten off.
UPDATE:
Hey Guys! I saw this Mustache Pattern
today and thought it might be a nice alternative 'stache for the
beardhat. Especially if you're having trouble with my pattern. Not sure if I would stuff it too full, but it'd be worth
trying!

Use a few inches of scrap beard yarn to tack the edges of the mustache on to the beard, then use the scraps of hat yarn to tack the beard onto the inside of the hat.Pattern Note: If making it as a gift, consider tacking it with the yarn but tie the yarn in a bow instead of a knot. That way it’s easy to adjust if needed. You could also safety pin the beard onto the hat until the person has a chance to try it on, then tack it in place for them.
GENIUS!
Laura Morris over on Ravelry had the genius idea of attaching the beard using velcro instead of a permanent attachment. "The velcro gives the beard the ability to grow with the little ones I made them for! Plus you don’t have to be worried about different facial shapes. It’s win!" And Laura, it is EPIC WIN! I can't believe I didn't think of it! So, fellow crafters, enjoy her insights and enjoy your beardhats.
 |
| Photo Compliments of Laura Morris |
|
 Just wanted to share with you all the hats I made last week for my soon-to-be niece and nephew.