Vicky just sent me this link in an email, and I thought it would be nice to share. Some of the names of stitches are outdated (I think) since i have seen similar stitches called by different names. But its still a cool reference if you are looking to add texture to an otherwise simple swatch of fabric.
Encyclopedia of Needlework: Crochet
Tuesday, March 29, 2011
Thursday, March 24, 2011
A Shameless Request

In the meantime she is fundraising money, so that women everywhere can be able to have these valuable preventative screenings. Please click on the link below and make a donation.
Donate to Save a Life
Since I know you're awesome and are going to jump all over that donations link, here is a link to a cute spring flower pattern, as my thank you :)
Crochet Spot: Simple Spring Flower
Wednesday, March 23, 2011
Das Beardhat - Revised
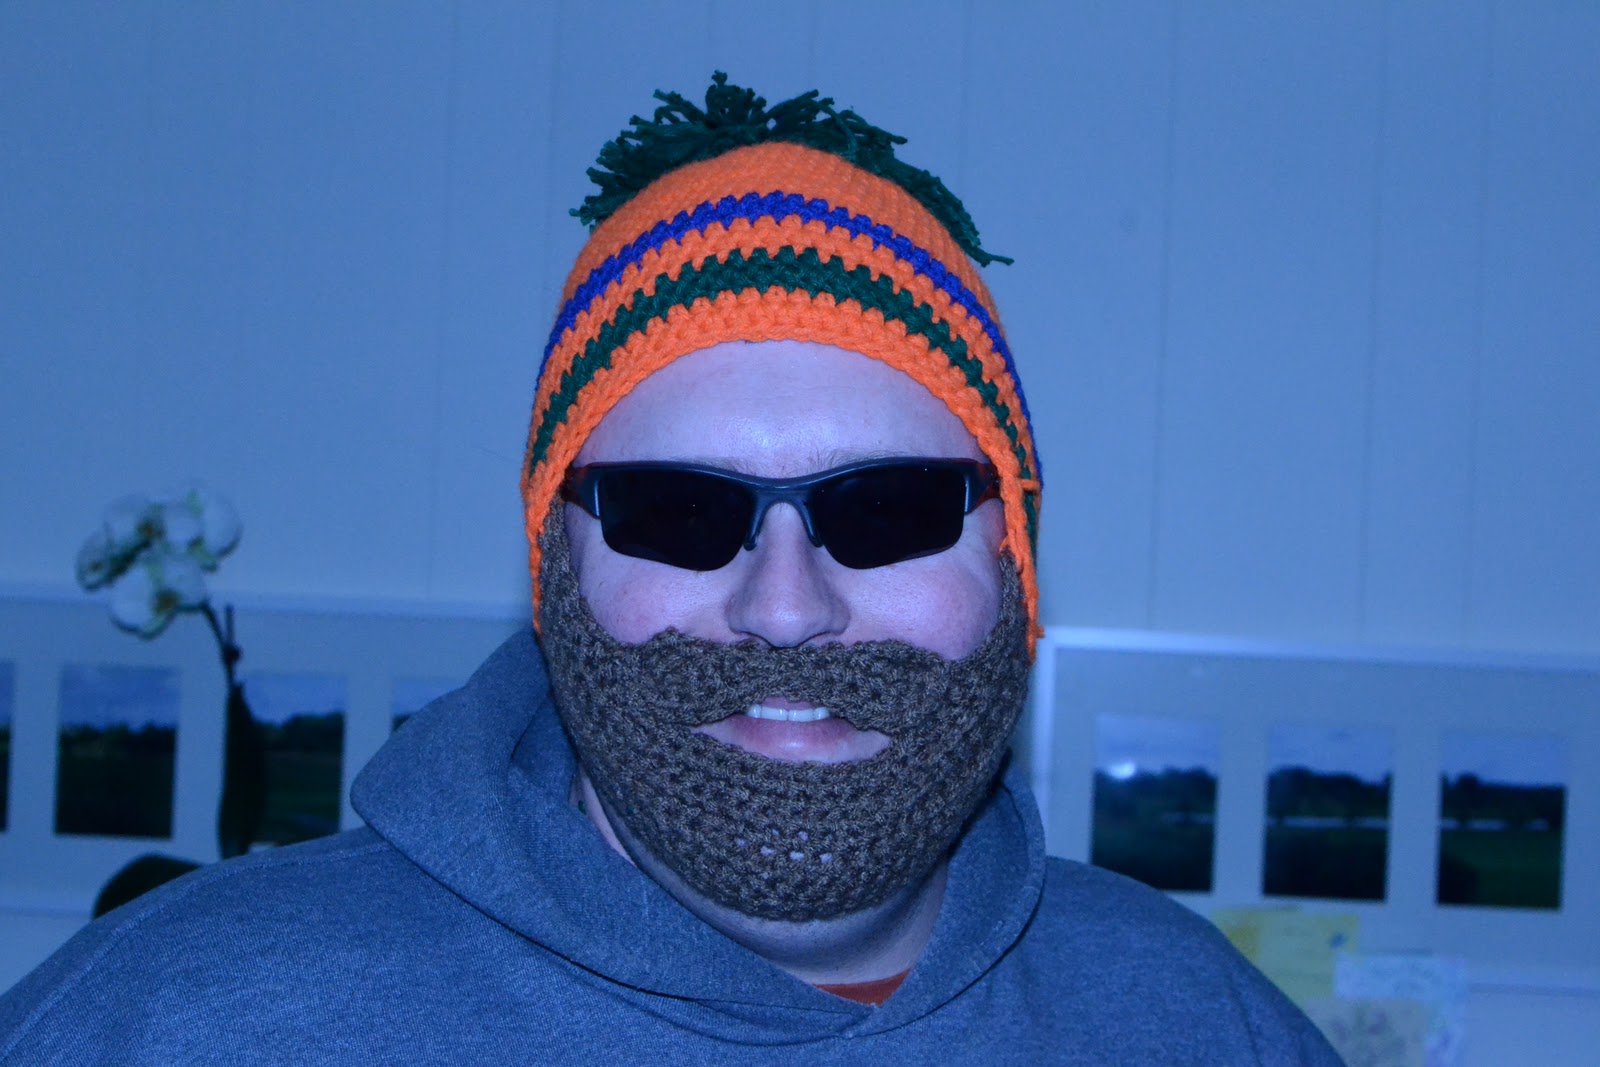 So, I headed into the construction of another beardhat, and I took the opportunity to learn from my adventures with the first BeardHat and I made the "sideburns" a little bit wider. I also made the shaping a little smoother. It should be noted that somehow, the first pattern turned out a little larger, so that may be something you want to consider if you or the person you're making it for has a larger face (whatever that is). The mustache is exactly the same.
 Begin with the hat of your choice, setting aside some scraps of the hat color yarn to tack the beard onto the hat.
Yarn: Red Heart Super Saver
Hook: I use a 5mm (Most commenters have had more luck with 6.0 or 6.5)
Gauge: I don't measure this stuff....I tend to stitch loosely, so you Definitely want to consider a 6.5 or 6.0 hook if you know you're a tight stitcher **cough**Donna**cough**
The Beard 2.0:
Hook: I use a 5mm (Most commenters have had more luck with 6.0 or 6.5)
Gauge: I don't measure this stuff....I tend to stitch loosely, so you Definitely want to consider a 6.5 or 6.0 hook if you know you're a tight stitcher **cough**Donna**cough**
The Beard 2.0:
1. Fsc 28 sts, ch1, turn (you could also just ch 29, skip the 1st ch on the hook and sc 28)
2. Sc in each st across, ch1 + turn
3. Sc in next 10 sts, repeat (2sc in next st, 1 sc in following st) over the next 8 sts, then sc in each of the remaining 10 sts, ch1, turn
4. Sc in each st across, turn
5. Sl st in first 8 sts, sc in next 17 sts, sl st in remaining sts, turn
6. Sl st in first 8 sts, sc in next 5 sts, hdc in the next 7 sts, sc in next 5 sts, sl st in remaining sts, turn
7. Sl st in first 11 sts, sc in next 3 sts, hdc in next 5 sts, sc in next 3 sts, sl st in remaining sts, ch1, turn
8. 2sc in first st, sc in each of the next 7 sts, sl st loosely in next 3 sts, sc in next 10 sts, sl st loosely in next 3 sts, sc in next 7 sts, 2 sc in last st. Ch 1, turn
9. Sc in first 7 sts, sl st loosely in next 4 sts, sc2tog, sc in next 8 sts, sc2tog, sl st loosely in the next 4 sts, sc in last 7 sts, ch 1, turn
10. Sc in first 6 sts, sl st loosely in next 4 sts, sc2tog, sc in next 8 sts, sc2tog, sl st loosely in the next 4 sts, sc in last 6 sts, ch 1, turn
11. Sc in next first 4 sts,hdc innext 4, sc in next st, sl st in next 12 sts, sc in next 1, hdc in next 4 sts, sc in last 4 sts
12. Bind off
The Mustache: (Pictures Added 12/24/12 to help clarify - click photo to enlarge)
1. Ch11, sc in 1st ch from hook, and sc in each st across (10 sts total)
2. Without chaining, sc into the side of the sc you just made, (keep going in the same direction as if working in-the-round, you may have to fudge it) and then into the back of the first 2 base ch sts. (again, you're working in the round for a moment to make a spiral effect) Sl st into the back of the next ch st. turn.

3. Sl st into the top of the sl st you just made. Sc into the next 2 sts. 2 sc into the next st. sc in each of the next 4 sts. Sl st in each of the next 2 sts. Sc in next 4 sts. Sc in the end of the last sc. Sc into the back of the first 2 ch sts. Sl st into the back of the next ch st. turn.


4. Sl st into the top of the sl st you just made. Sc into the next 2 sts. 2 sc into the next st. Continue on with a sc in each of the next 4 sts. Sl st in each of the next 2 sts. Sc in each of the next 4 sts. Sl st into next st. fasten off.

UPDATE:
Hey Guys! I saw this Mustache Pattern today and thought it might be a nice alternative 'stache for the beardhat. Especially if you're having trouble with my pattern. Not sure if I would stuff it too full, but it'd be worth trying!

UPDATE:
Hey Guys! I saw this Mustache Pattern today and thought it might be a nice alternative 'stache for the beardhat. Especially if you're having trouble with my pattern. Not sure if I would stuff it too full, but it'd be worth trying!

Use a few inches of scrap beard yarn to tack the edges of the mustache on to the beard, then use the scraps of hat yarn to tack the beard onto the inside of the hat.Pattern Note: If making it as a gift, consider tacking it with the yarn but tie the yarn in a bow instead of a knot. That way it’s easy to adjust if needed. You could also safety pin the beard onto the hat until the person has a chance to try it on, then tack it in place for them.
GENIUS!
Laura Morris over on Ravelry had the genius idea of attaching the beard using velcro instead of a permanent attachment. "The velcro gives the beard the ability to grow with the little ones I made them for! Plus you don’t have to be worried about different facial shapes. It’s win!" And Laura, it is EPIC WIN! I can't believe I didn't think of it! So, fellow crafters, enjoy her insights and enjoy your beardhats.
 | |
| Photo Compliments of Laura Morris |
Sunday, March 20, 2011
Projects all over the place!
So I haven't posted in a while, and I can't blame it on any one thing. I moved from Missouri back to my hometown in Michigan, which was quite the ordeal. Due to the fact that my lease in Missouri was paid up until the end of April, on top of the fact that it is impossible to hunt for an apartment from three states away, I am temporarily staying with my folks. I love them to death, but this has resulted in about 95% of my possessions being in storage boxes in the garage. This includes most of my crafting supplies.
I have managed to keep a few projects going. And going. And going.
I'm working on an afghan for my sister, which is coming along well, but it is a large project and not very portable given the quantity of yarn I have to drag about with me. I also started working on an R2D2 hat with some random yarn I found in the garage while moving. Its 98% finished, but I need to add his little red button. This involves finding my red yarn, which is in a storage box at the bottom of the pile. I'm also in progress on my coin bra for my bellydancing costume. Its got about 50 coins already on it, and I'm thinking I should start adding other fun things which I have yet to find/buy.
As if that were't enough, I've also picked up some tulle from the craft store and made a dish scrubby with it. It was nice quick project that lends itself to becoming Christmas gifts next season.
So now, if i can actually finish a project, I will happily post it and its pattern for your thorough enjoyment. Until then, I keep picking up new things to work on and then leaving them amongst the growing pile of unfinished objects (UFOs) which live in the bottom of my bin.
Subscribe to:
Posts (Atom)