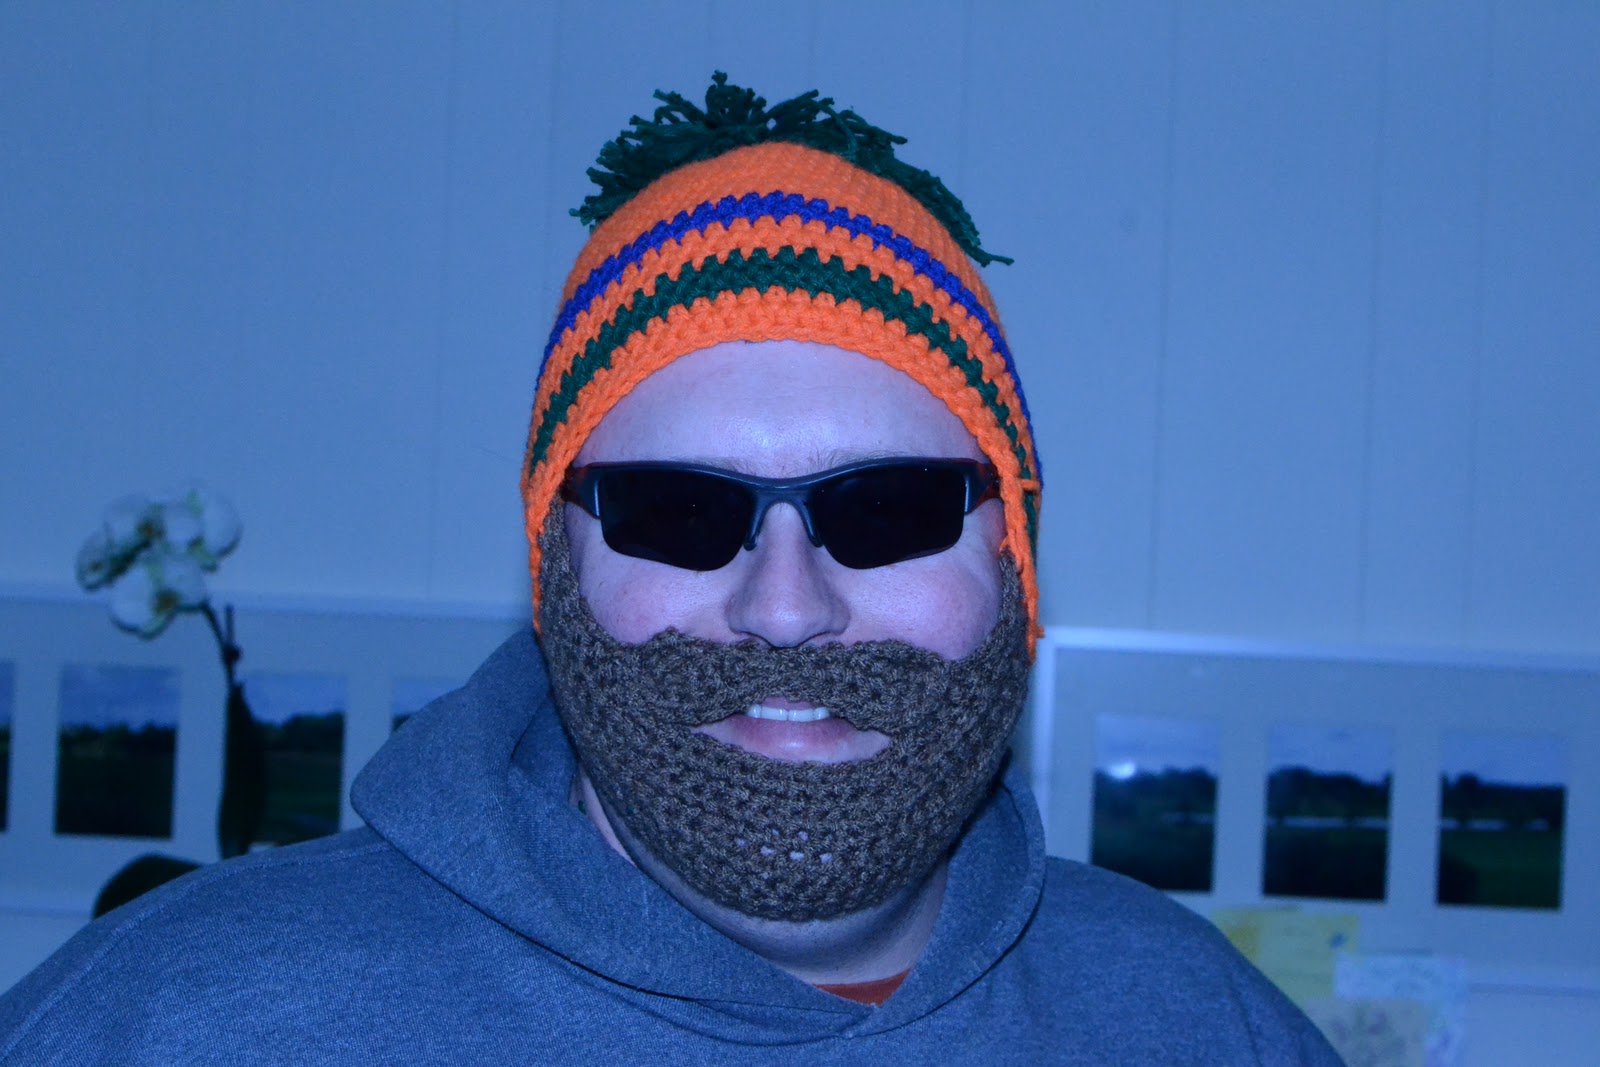
 So, I headed into the construction of another beardhat, and I took the opportunity to learn from my adventures with the first BeardHat and I made the "sideburns" a little bit wider. I also made the shaping a little smoother. It should be noted that somehow, the first pattern turned out a little larger, so that may be something you want to consider if you or the person you're making it for has a larger face (whatever that is). The mustache is exactly the same.
 Begin with the hat of your choice, setting aside some scraps of the hat color yarn to tack the beard onto the hat.
Yarn: Red Heart Super Saver
Hook: I use a 5mm (Most commenters have had more luck with 6.0 or 6.5)
Gauge: I don't measure this stuff....I tend to stitch loosely, so you Definitely want to consider a 6.5 or 6.0 hook if you know you're a tight stitcher **cough**Donna**cough**
The Beard 2.0:
Hook: I use a 5mm (Most commenters have had more luck with 6.0 or 6.5)
Gauge: I don't measure this stuff....I tend to stitch loosely, so you Definitely want to consider a 6.5 or 6.0 hook if you know you're a tight stitcher **cough**Donna**cough**
The Beard 2.0:
1. Fsc 28 sts, ch1, turn (you could also just ch 29, skip the 1st ch on the hook and sc 28)
2. Sc in each st across, ch1 + turn
3. Sc in next 10 sts, repeat (2sc in next st, 1 sc in following st) over the next 8 sts, then sc in each of the remaining 10 sts, ch1, turn
4. Sc in each st across, turn
5. Sl st in first 8 sts, sc in next 17 sts, sl st in remaining sts, turn
6. Sl st in first 8 sts, sc in next 5 sts, hdc in the next 7 sts, sc in next 5 sts, sl st in remaining sts, turn
7. Sl st in first 11 sts, sc in next 3 sts, hdc in next 5 sts, sc in next 3 sts, sl st in remaining sts, ch1, turn
8. 2sc in first st, sc in each of the next 7 sts, sl st loosely in next 3 sts, sc in next 10 sts, sl st loosely in next 3 sts, sc in next 7 sts, 2 sc in last st. Ch 1, turn
9. Sc in first 7 sts, sl st loosely in next 4 sts, sc2tog, sc in next 8 sts, sc2tog, sl st loosely in the next 4 sts, sc in last 7 sts, ch 1, turn
10. Sc in first 6 sts, sl st loosely in next 4 sts, sc2tog, sc in next 8 sts, sc2tog, sl st loosely in the next 4 sts, sc in last 6 sts, ch 1, turn
11. Sc in next first 4 sts,hdc innext 4, sc in next st, sl st in next 12 sts, sc in next 1, hdc in next 4 sts, sc in last 4 sts
12. Bind off
The Mustache: (Pictures Added 12/24/12 to help clarify - click photo to enlarge)
1. Ch11, sc in 1st ch from hook, and sc in each st across (10 sts total)
2. Without chaining, sc into the side of the sc you just made, (keep going in the same direction as if working in-the-round, you may have to fudge it) and then into the back of the first 2 base ch sts. (again, you're working in the round for a moment to make a spiral effect) Sl st into the back of the next ch st. turn.

3. Sl st into the top of the sl st you just made. Sc into the next 2 sts. 2 sc into the next st. sc in each of the next 4 sts. Sl st in each of the next 2 sts. Sc in next 4 sts. Sc in the end of the last sc. Sc into the back of the first 2 ch sts. Sl st into the back of the next ch st. turn.


4. Sl st into the top of the sl st you just made. Sc into the next 2 sts. 2 sc into the next st. Continue on with a sc in each of the next 4 sts. Sl st in each of the next 2 sts. Sc in each of the next 4 sts. Sl st into next st. fasten off.

UPDATE:
Hey Guys! I saw this Mustache Pattern today and thought it might be a nice alternative 'stache for the beardhat. Especially if you're having trouble with my pattern. Not sure if I would stuff it too full, but it'd be worth trying!

UPDATE:
Hey Guys! I saw this Mustache Pattern today and thought it might be a nice alternative 'stache for the beardhat. Especially if you're having trouble with my pattern. Not sure if I would stuff it too full, but it'd be worth trying!

Use a few inches of scrap beard yarn to tack the edges of the mustache on to the beard, then use the scraps of hat yarn to tack the beard onto the inside of the hat.Pattern Note: If making it as a gift, consider tacking it with the yarn but tie the yarn in a bow instead of a knot. That way it’s easy to adjust if needed. You could also safety pin the beard onto the hat until the person has a chance to try it on, then tack it in place for them.
GENIUS!
Laura Morris over on Ravelry had the genius idea of attaching the beard using velcro instead of a permanent attachment. "The velcro gives the beard the ability to grow with the little ones I made them for! Plus you don’t have to be worried about different facial shapes. It’s win!" And Laura, it is EPIC WIN! I can't believe I didn't think of it! So, fellow crafters, enjoy her insights and enjoy your beardhats.
 | |
| Photo Compliments of Laura Morris |
ah haha... I need to make one of these! Awesome! Thanks for the pattern!
ReplyDeleteMy brother requested one of these, thank you for the pattern! :D
ReplyDeletelove the pattern! I'm making one for my brother. HOwever, I was wondering what fsc stands for. I know the sc, but it's the f that confuses me ^.^
ReplyDeleteThanks!
First single crochet.
Deletef stands for foundation - also seen as chainless. I hat working into the base chain, so I use that stitch alot.
ReplyDeleteI found a youtube tutorial if you are interested
http://www.youtube.com/watch?v=A83tzk49DzI
but you could always just ch 29 and then go back and sc in the 28 sts across. I just think the fsc gives a little more stretch.
Thank you - I used your pattern for my grandson in Aus - He is delighted.:)
ReplyDeleteIm new to crochet and I am having trouble with step 2. Mostly with how to sc into the back of the first 2 ch sts. Sl st into the back of the next ch st. turn.
ReplyDeleteAny advice or help would be greatly appreciated.
I have been crocheting for many years and I am still having trouble figuring out the mustache. If you figured it out and have any advice I would greatly appreciate it
DeleteI just made this for my soon to be 14 year old son for his birthday! He'll love it! Thanks for the pattern! :) -kim
DeleteOMG! I love this!!!!! I am totally making one for my daughter. So funny!
ReplyDeleteReally cute! My grandson will love this...thanks so much for the pattern!
ReplyDeleteI so totally have to make this!
ReplyDeleteFor step 2 of the moustache, what you have done is created a row of sc into your base chain, and now instead of turning around and going back like you usually would, you're basically working in the round, going towards the back of the base chain sts.
ReplyDeleteTHANK YOU FOR SHOWING HOW TO CROCHET THIS HAT AND BEARD,,,,,,,I HAVE A COUPLE,,,LETS SAY"HAIR CHALLENGED" SON-IN-LAWS THAT CAN REALLY USE ONE OF THESE THIS WINTER !!!! THANKS AGAIN,,,,,DONNA
ReplyDeleteAs a beginner, I also have a problem with the second step of the mustache.
ReplyDelete"2.Without chaining, sc into the side of the sc you just made, and then into the back of the first 2 ch sts. Sl st into the back of the next ch st. turn."
Questions I have:
1. By "side of the sc you just made," do you mean that I should make sc from the outer edge of the chain that i had just made?
2. "into the back of the first 2 ch sts." = are the first two chain stitches you mention here the base chain stitches or the stitches that you just made from the side?
I would greatly appreciate it if someone would clear these up for me. Thank you!
Dear Jane, please see the comment I made 9/27/11. I have also tried to clarify in the main pattern. For a picture of the finished mustache by itself, click the link to my original beardhat pattern in the first paragraph.
ReplyDeleteThat cleared things up for me. Thank you so much for the help! It worked out beautifully.
ReplyDeleteYay!! Thanks! I loved it, it's easy to follow. And this will make great stocking stuffers!!
ReplyDeleteTY- Diana
Thanks for the awesome pattern! This is easy to follow and super easy to make!
ReplyDeleteI do have one question thought: which long edge goes under the chin? Is it the edge with the chain stitches, or the edge that the pattern finishes off with? Thanks!
The starting row goes under your chin, and the last row that you make will go under the lower lip. (Or if it fits better the other way, who am I to argue?!)
ReplyDeleteHello
ReplyDeleteI am new here. I am from Germany. My English is not the best.
Where can I find a list of abbreviations of the manual?
Please help me. Thank you. Nancy
Nancy, I recommend the book
ReplyDelete"Stitch 'N Bitch Crochet: The Happy Hooker"
It is available through amazon.com and many other stores.
It has all the instructions, abbreviations, and everything else you'll need.
You can also check out learntocrochet.lionbrand.com for free videos.
My boyfriend is going to love this!! Thank you!
ReplyDeleteI have been trying to find a pattern for a beard hat for ages (my dad requested it for christmas)!!! Thank you!!!!!!! :)
ReplyDeleteI love this hat. Just for a little fun I may try to add some fun fur to the outside of the beard and stash, after crocheting....weave it in to the outside only. We live in Alaska and my sons work outside....they already think I am nuts, this will confirm it. Thanks Vikki
ReplyDeleteI like it! I believe hunters will too!
ReplyDeleteSome people on Ravelry have made this with fun fur or a strand of eyelash held in with the worsted yarn. They look GREAT!
ReplyDeleteUnfortunately, on both occasions when I made a beardhat myself, I was working up the pattern and its revisions, and thats tough to do when you can't count sts!
My son has been telling me about hats like this and begging for one. Well, now he's gonna get it! =) Thanks for sharing your pattern!
ReplyDeleteAndrea,
ReplyDeleteI added this (and other things) to my Pinterest site. Please let me know if you want me to take it down.
In case you're not familiar with Pinterest, it takes the user to your site, so credit is given.
Its all over pinterest, so thats fine!
DeleteThanks for posting this. I am making some for friends on St. Patty's Day! Should be a riot! I also wanted to share that I will attached the beard with buttons placed inside the hat so it will detach even easier! Happy Crafting!
ReplyDeletedo have this in a child's size?
ReplyDeleteI think it is child size! It turned out way too narrow to reach an adult hat when I made it
DeleteFirst one i made, i had to use an N to get the right size
ReplyDeleteHow popular is this crazy looking hat! I did one of these for a friend. Her husband wanted one for his birthday and he is crazy about it. I added eight stitches to make the sides a little longer, used a bulky softee yarn, and increased the crochet hook to a J. It turned out great. Everyone who sees it wants one. The idea about using velcro to fasten is perfect. I am doing one in pink for a girl. Supper pattern thanks for sharing.
ReplyDeleteThis comment has been removed by the author.
ReplyDeleteI don't mind if you make commissioned pieces here and there, but I would prefer that you don't mass-produce or sell online.
DeleteI truly like to reading your post. Thank you so much for taking the time to share such a nice information.
ReplyDeletebeardowear
I had a question on step 4 through 7. First off I noticed that you stopped ch1 at the end of the rows. I tried doing that and stitching into the second stitch but the numbers don't add up. I tried just turning and stitching into the first stitch but it is very difficult to do that. My other question is how do you stitch into the slip stitches? Through the two on the top (connecting one of the SC on the previous row to one of the Slip stitches) or just through the slip stitches? I tried looking it up but it's not really a common practice so there's no info on it.
ReplyDeleteSte 4 should have a ch1 at the start. For the rest, you CAN slip stitch into a slip slitch, OR you can go into the sc below it. Its just so that you can move across without increasing depth. If you need to ch1, you can. Don't sweat the stitch count, I almost always get mine wrong and have to fudge it, no matter what pattern I follow.
DeleteI saw this and laughed so hard I cried. My son and his girlfriend thought I was nuts. It makes you wonder what kind of dreams the people have that think these things up! I can just see my nephew wearing this! I LOVE THIS!
ReplyDeleteIs there by any chance a YouTube video on this mustache. I just cannot get it to turn out correctly and I have no idea what I am doing wrong. I have been crocheting for years but for some reason this mustache has me completely stumped. Thanks for any help.
ReplyDeleteBrandi
I found it to turn out lopsided every time.
DeleteI use this mustache pattern instead and I like it a lot better! You can look for almost any mustache pattern and add it to the beard!
Deletehttp://www.ravelry.com/patterns/library/handlebar-moustache
I made this beard and it turned out wonderfully. The mustache left something to be desired though so I came up with my own design for that. Sure wish I would have written it down. I see I'm not the only one who had a problem with the mustache. I'll work on it today.
ReplyDeleteI made a beard hat for my grandson before I found your pattern. It is very similar, but unlike yours, I attached mine with a button on each side. This way, they can adjust for fit or remove it completely if the day gets warmer...as happens so often here in North Florida! We may start off freezing and end up in the 70's!
ReplyDeleteSomeone send me the picture but I had no instructions, so needless to say I was delighted when I came across this page. Thanks so much, I just love it, funny, cute and useful (I think). I am going to surprise my husband with one.
ReplyDeleteIs this pattern meant to be for a child? The photo is an adult, but when I made it the beard was not nearly wide enough to reach an adult hat.
ReplyDeleteShe mentions she crochets VERY loosely and if you don't crochet loosely, you should use a bigger hook. I've made dozens of these and for me the J hook (6.0) works the very best, it fits all adults who have worn it.
DeleteThanks! Maybe I'll try a bigger hook next time.
DeleteAnother thing, although it's not in the pattern, I've found best results with adding a ch1 to every row that doesn't already have it - so essentially you ch1 at the end of every single row except the very last one. It doesn't end up perfectly even on each side, but it's much more even than without the ch1's (in my experience) and you can stitch it to a hat in such a way that it appears even.
ReplyDeleteSandra Westfall February 4\13
ReplyDeleteI have a question regarding (2sc in next st, 1 sc in following st). not sure what (following st) means compared to (next st).
Referring to the next stitch, and the stitch after it (2 sts in total)
DeleteI have made my husband several hats. He works out in the cold at night. He wears the hats just to keep warm. He walked by the computer as I was looking at this and pitched a fit! He has a beard but was excited that he could shave his off and wear this to keep his face warm! Guess I'll be making this one!! Thank you for the pattern!
ReplyDeleteI am making one for a friend and thanks for idea of using velcro
ReplyDeleteIf I made these, would you mind if I sold them on Etsy?
ReplyDeleteUm, I know there are plenty of Etsy vendors out there already selling this. And that is part of why I created a free pattern out there. They inspired this pattern, and I would really hate to take away from their business.
Deleteon those cold morning walks - I could use a beard-hat myself! thanks!!
ReplyDeleteAwesome thank you for this pattern. My aunt wanted me to make one of these for her husband and I couldn't find a good pattern this one was a winner. I really appreciate that I can finally give this as a gift. :)
ReplyDeleteMarites Allen is popularly known as the “Philippine Feng Shui Queen” for her great strides in promoting feng shui practice in the country and in other parts of the world. She is the first Filipina to be awarded the prestigious title of “Master in Feng Shui” by the International Feng Shui Association in 2013 Feng Shui Expert in the Philippines
ReplyDeleteThank you so much for this pattern! Just one thing I didn't see a pattern for the hat
ReplyDeleteOMG I LOVE THIS PATTERN
ReplyDeleteThanks for providing valuable information.
ReplyDelete