Showing posts with label Lace. Show all posts

Sunday, July 6, 2014

The Crochet Lace Veil Project


So some of you have followed my journey in making my own crochet lace as the border for my wedding veil. The wedding is over, and the professional pics are in, so here's the top to bottom summary of everything I did.

Step One: Decide on a pattern. I had several attempts, seen here and here. I settled on this pattern that I found online. One of the biggest factors in the decision was the way the lace works up one motif at a time, as opposed to needing a base chain that is 17' long. HUGE advantage and I am very glad I went the motif route.

Step Two:
Make the lace! Or at least until it is approximately the right length.


Step Three: Once you have what you suspect to be the correct length of lace, grab yourself a scrap piece of fabric or tulle, and cut it to the dimensions you want the final veil to be. Then starting at the beginning of your lace piece, pin it on around the edge. This is dual-purpose. It helps you make sure you have the correct amount of lace, while at the same time, it lays the lace flat (at least in perspective to the fabric) so that you can make sure you haven't twisted it before you join it into a round piece.


Step Four: Make more lace as needed. I found out that I was about 12-18" short after pinning my lace onto the tulle template. I was definitely bummed, but at least it looked pretty!

Step Five:
Now that you're done making all the lace, join that lace into a round! Add another row if you pattern calls for it, or if you want to create a more stable section for sewing it on. My pattern had a second "round" that was done in the back ch loops.

Step Six: Remove all of the lace from the template piece. Wash it GENTLY in some warm water with just a dab of dish soap. If your lace color matches the color of your dress (or whatever color you want it to be) move to Step Eight. Otherwise, you're going to want to dye your lace.


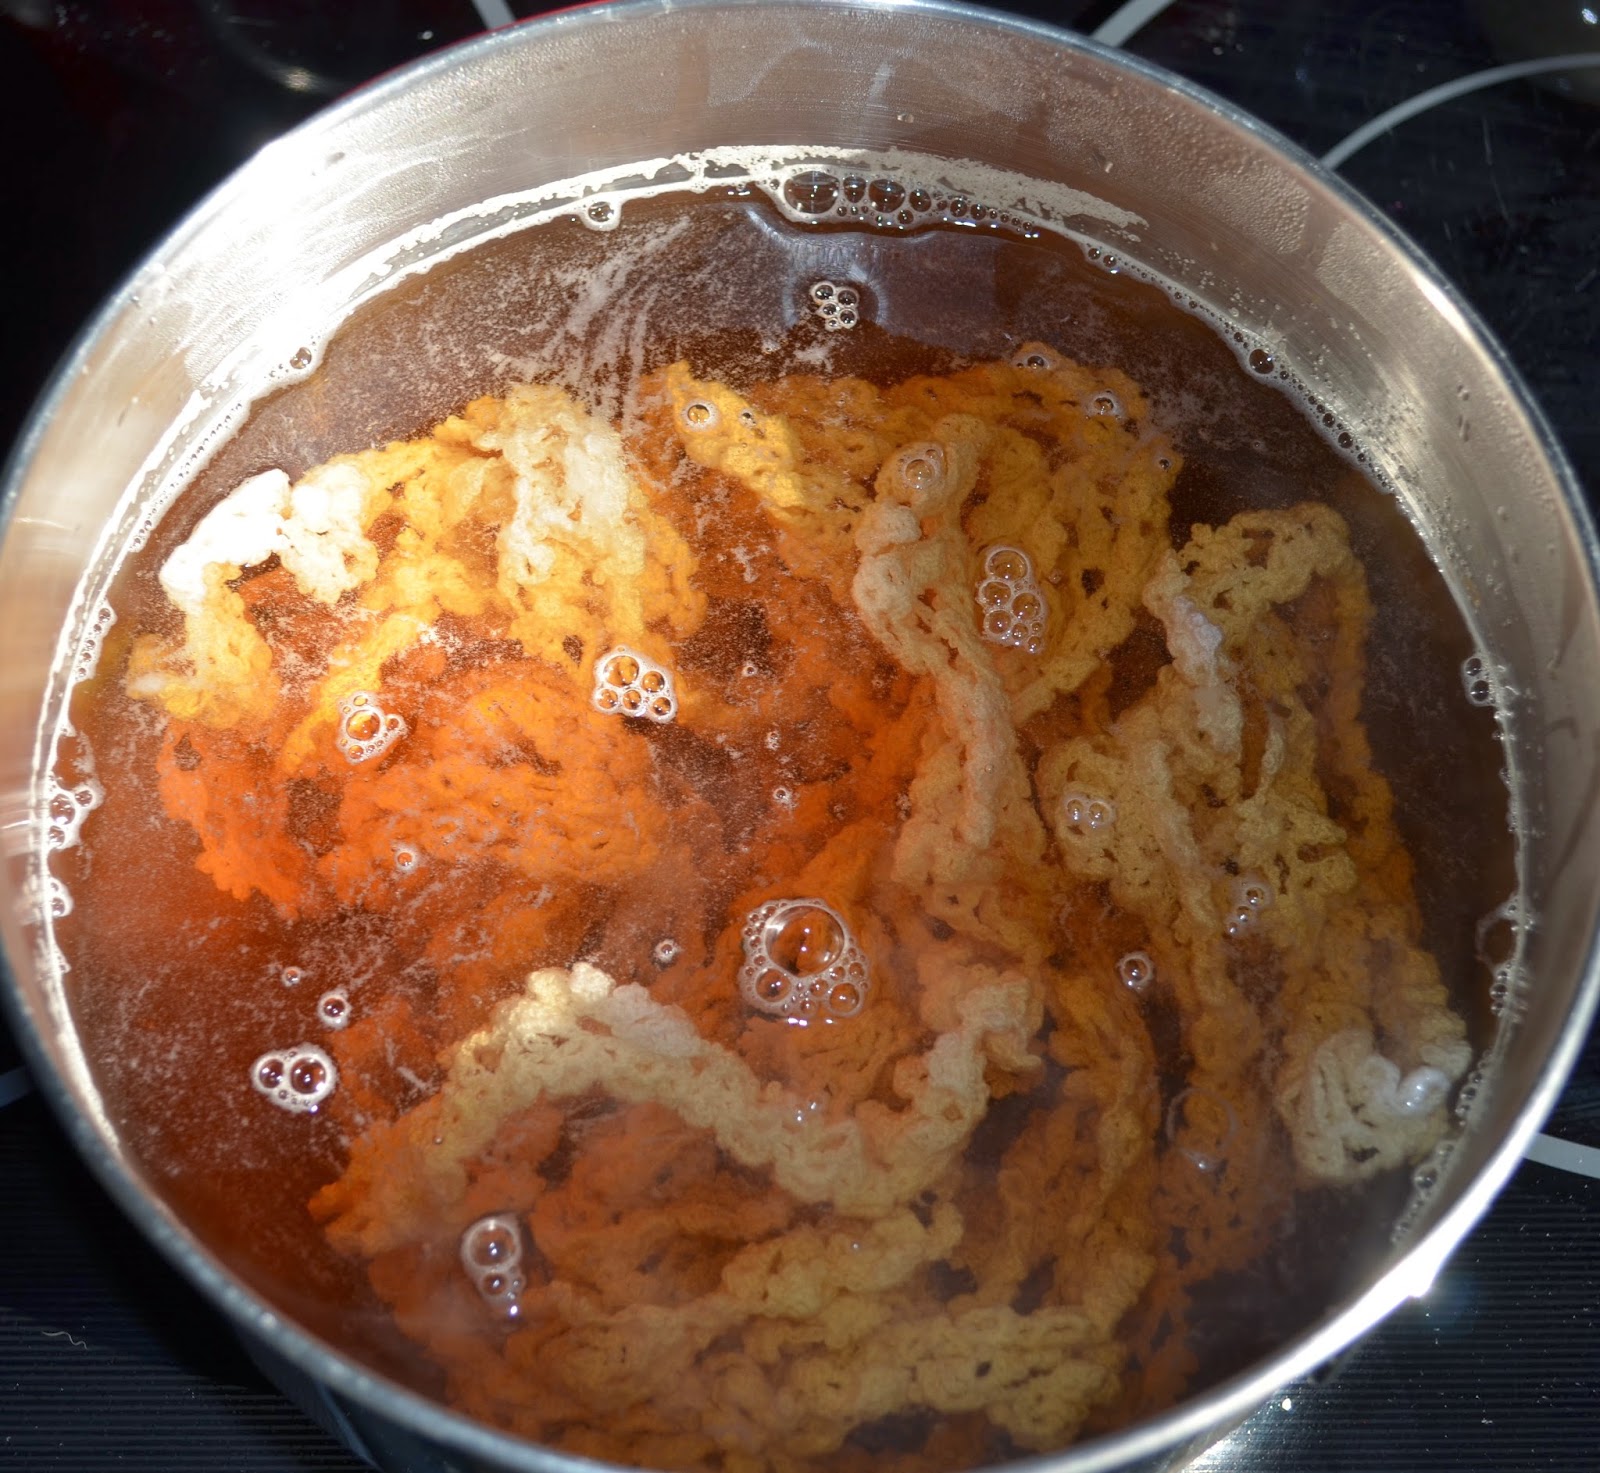
Step Seven: Tea Dye your lace. Start by test dying any samples of your thread, to make sure you know how much tea and how long it needs to soak to get the desired shade. Dye it and let it dry completely. If you are insane, you could block it now while the lace is wet. However, I am not that kind of crazy, and since my lace was cotton, I decided just to iron it.


Step Eight: Press your lace. Enjoy watching it unfold into something beautiful! Be warned, now that your lace is nice and flat and arranged, it is probably even longer than it was before. The template you made before may be too small, depending upon how much your lace stretches.


Step Nine: Call in reinforcements! Extra sets of hands will help with the remaining stages!


Step Ten: Cut the veil material (sheer or tulle) to approximately the right size. We made mine quite a bit bigger than the template. We folded it into quarters, weighted it in place with some heavy books, and used the edge of grandma's dining room table to get a nice gentle oval shape.


Step Eleven:
Pin the lace around the edge. We found that once we pinned it, our tulle was too large. We had to un-pin everything and trim just a little bit of the tulle to get it to fit correctly. I am sure there is a way to avoid this, but for us, it didn't take too much time, and it worked out alright. It was easier to cut down a little bit of tulle than to have too little - since the lace couldn't easily change!


Step Twelve: Carefully sew the lace around the edge. We hid our sewing stitches in amongst the crochet stitches, so we just used a matching ivory thread. Tiny stitches!


Step Thirteen (optional): If you want to wear the veil on a comb, decide how you want to fold it an wear it. I found some great resources to help with this step. Wrap the comb in scraps of tulle and sew them in place, then gather your veil gently on a thread, and sew the gathered section of veil onto the comb. Add sparkles if you like!


Step Fourteen: Wear it with Pride! Pass it down to friends or family who want to wear it too!


Wednesday, January 22, 2014

Tea Dye for Crochet Cotton

Those of you who follow my blog may be familiar with the ongoing saga of my crochet lace veil. I posted some of the samples I made here and here, and I have outlined my progress in photos over here on imgur.

To catch you up on things, I decided to crochet the lace to go around my bridal veil, and I've been working away on this for about a year, if not longer.

Well folks, this past Saturday, I finished the lace! 18.5 FEET of beautiful Sz 20 lace.

Except that the lace is white, and my dress is ivory. So I needed to tea dye it to match my dress.

Now, I had never tea dyed anything before, but I did have a sample of fabric from my dress shop, so that I could at least have a goal color to work off of.

I read about tea staining over on Dahlhart Lane blog, and I decided to use some of my old lace samples to run some tests.

I used 1 teabag for 2 cups of hot water. With the teabags and the lace all in a mason jar, I added the water and shook it all up. For the record, teabags EXPLODE when you shake them in a mason jar. Don't do what I did.

I removed my lace samples after 5, 10, and 15 minutes in the tea bath. Anticipating that they might be darker when wet, I waited for them to dry before comparing them to my dress fabric.


Once I knew the time I needed (5 minutes or less) I washed up my veil lace. I wanted to get rid of any residual oils from my hands, and any incidental dust or dirt. I was SHOCKED at how dark the water got. So GROSS! So I washed and rinsed the lace (using a dab of dish soap) three times total, just to be sure.
Finally it was all nice and clean again!


I prepped my bowl by adding 3 teabags and 6 cups of hot water, but I let the tea steep for a few minutes and then I removed the teabags. I was SO nervous about dunking my lace into the tea! All that hard work! But I set the kitchen timer for 4 minutes and placed it into the tea bath. After 4 minutes, the lace matched my dress sample fabric perfectly. Knowing it would dry a little lighter, I gave it another 30 seconds in the tea bath before I pulled it out and rinsed it. After a thorough rinsing, I washed it with a dab of dishsoap and laid it out to air dry. I chose not to block it at this point because, dear LORD, can you imagine pinning all of that. NO. no no no no no.


Once it was dry, it was a big ugly wad of creamy ivory. I got to work ironing it. This was the most amazing part. Time consuming, but amazing. It was so great pulling this ugly wad of material, pressing it, and having this lovely bit of lace appear on the other side!


So it is crochetted, dyed, pressed, and ready to be sewn onto tulle. I'm going to try and work with some family this weekend to get it completely finished!!!

Sunday, February 10, 2013

Lace Samplers

Well, I figure its almost crunch time for me to get started on making the lace for my veil. I'm planning to make an oval, full-length, mantilla veil that can be worn several ways and passed down to other friends and family who are getting married. Traditional mantilla veils seem to have 3-4" wide lace all around the border. Knowing that I need ~17' of lace to go all the way around my border, I think 4" is a bit over-ambitious. So I've played around with different patterns that are anywhere from .5" to 2.5" wide.

I've posted a few bracelets before, but as pretty as the lace is, I haven't loved the look of it for the veil. Here's my previous post.

And here are the new patterns I've worked up:


Similar to the lace I did last time.
Pattern #147
I wanted to keep it simple, but I like the more romantic look of a shell pattern.
Pattern #73

I went for something wider, and I really liked it.
Wide Scallop Pattern
This is probably my favorite. It has the shell pattern, but it is more of a "lacy" look than pattern #73.
Pattern #3018

So I've had several people tell me that they like the simpler edging. I can see that it would have more versatility. However, they are both worked into the base chain long-ways. Meaning I would chain 17' and then work 17' of sc into that base chain. If you've ever done base-chain work with lace, you know you can only do a limited amount in a sitting before your fingers are in agony. The larger two pieces have a short base-chain, and are then worked one motif at a time, across. This would be a bit easier on my hands. Also, I feel like if I'm going to spend approximately 80 hours working into the base chain (based on some preliminary calculations) that I would want the lace to be pretty damn impressive.

Ok, folks, what do YOU think?


Wednesday, December 26, 2012

Christmas Crochet 2012


Alright Folks! The gifts have been given and here's the crochet round-up!


Michigan State Scarf
No pattern for this one. I think I started with a ch 14, but don't quote me on that. I know I used dcs in each stitch across. I ch 2 in the turning chain, because, for me, that helps to even out the rows.
Added a fringe. Thats about it.
6.5mm Hook & Red Heart Super Saver Yarn


Winter Day Moebius Cowl
Made just like I did the Rainy Day Mobeius Cowl last Christmas.
The yarn was "Sensations Rainbow Boucle" and it was NOT fun to work with. They LIE when they say you need a 5.5mm hook. LIES. SO I ended up working 2 strands together and using a 6.5mm hook. Not bad, but if I could find my 9mm hook, I bet that would be even better. Still turned out nice though.


Pineapple Pattern Shawl
I really love this pattern. Its called the Sidewalk Shawl and it is very pretty. Not too complicated once you get going either. I used Red Heart Super Saver and I stopped short of the pattern because it was big enough. Used a 6.5mm hook (are you seeing a trend yet?)
Very pleased with this one overall.


Magnificent Mantle Shawl
Well, this shawl pattern did not work well with this yarn. Again, I used the "Sensations Rainbow Boucle". My crochet center triangle came out so deformed that I frogged it and knit the stupid triangle. Just adding one increase on the first and last st of each row. Size 3 circular knitting needles for the center and 5.5mm crochet hook for the edging.


Golden Glimmer Fan Shawl
I used this Fan Shawl Pattern and Lion Brand Vanna's Choice yarn (in Topaz). I LOVE both the pattern AND the yarn. Used a 3.25mm hook and it worked up beautifully. Of the three shawls that I made up this year, this is my favorite pattern, and it got tons of compliments while I was working on it. 2 skeins wasn't really enough yarn though.


Seaside Scarf & Hat Set
Oh, look, more of the horrible "Sensations Rainbow Boucle" yarn. Why did I buy so much of this?! I knit the scarf using size 9 knitting needles, with the yarn held double. Improvised the hat with a 6.5mm hook and the yarn held double again. I fully intended to make a set of mittens or gloves to go with the set, but I just couldn't make it happen. Cast on to knit them 3 times with 3 different size DPNs and never could get the right gauge. Crochet just seemed like it would have been a nightmare because I couldn't see ANY stitches. At least its pretty.


Kevlar Survival Bracelet
Yes, you heard me. Kevlar. I stumbled across kevlar string on thinkgeek.com and I couldn't pass up the opportunity to make a survival bracelet for my favorite doomsday prepper, Kevin. I worked the first and last rows around a 3/4" parachute buckle and the rest is dc sts. I think the first and last row are sc stitches for stability. You CAN cut through the thread to trim it, if needed, FYI.

Baby Blues Cardigan
This is another pattern that was super easy and super cute. Its called the Don't Be Square Cardigan and it is 2 granny-style hexagons that are simply seamed on the sleeves and back. SO SIMPLE! I made this in September and didn't write down the hook I used, but I know I used scraps of "Red Heart" and "I Love this Yarn".


Thursday, August 9, 2012

Crochet Lace Masquerade Mask


I sat down to create a lace mask for Vicky’s Masquerade Wedding Reception. I started with my original pattern for the Crochet Lace Mask, and I decided I wanted a slightly different shape for this one. I aimed for a delicate pattern that had a pretty detail at the top center. I also intend to wear it with a stick-handle as opposed to a ribbon, though the pictures show it being held on with a piece of black elastic. I hope you enjoy it.

Lace Masquerade Mask

The below pattern is my original. Please let me know if there are any errors. Feel free to use it for charity, personal, and theatrical use. Please do not sell for profit.

ADVANCED PATTERN. Not advised if you don’t have some experience with crochet lace.
Yarn:
Aunt Lydia’s Crochet Cotton (Sz 10 – Black)
Hook: 1.5mm
Additional supplies:  
about 12” of 20 gauge wire
pair of needle nose pliers
wire cutters
Needle and matching thread
1” wide ribbon (approximately 1yard) OR Decorative stick-handle OR 12-16" Matching Elastic
Small swatch of matching fabric, ribbon, or swatch of crochet made with your yarn.

Abreviations (US):  Sl st = slip stitch; Ch = chain; Sc = single crochet; Dc = double crochet; RS = Right Side; WS = Wrong side

Begin by cutting the length of wire in half. Take each half of the wire and fold in over on itself to make a loop. Twist the loop shut to make an oval approximately 1”x 2”. The twisted end will be the inside corner of the eye of the mask.

Each of the eyes is crocheted separately, however the pattern is the same for both.

Eye Pattern:

Round 1: Sc loosely around the wire, beginning at the inside corner (twisted section) and working around. This took me 70 sc, but depending on your stitch size, you may have to add more to make sure that the wire is completely hidden. Sl st in 1st sc to join.

Round 2: Ch2. 1dc in each sc for 33 st. *2dc in the next sc, then 1dc in the following sc* Repeat * to * one more time. Then finish the round with 1 dc in each sc until you are back at the twist. Ch 1 and sl st in the 2nd ch of the ch2 that you started with to join.

Round 3: Ch3. Skip the first sts of the rnd and dc into the following st. *ch1, skip next st, dc in following st* repeat from * to * until you are at the outside of the eye (opposite the twist). ch 1, dc in next st. Then repeat *to * twice. Again, ch 1 and dc in the following sts. Resume the * to * pattern until you’re back at the twist. 4dc into the ch 1 sp from the previous round to jump over the twist, and join with a sl st to the 2nd ch of the ch2 that began the round.

Round 4: Ch1. Sc in each dc and in each ch 1 sp around. If your work is curling up, use 2sc in each ch 1 space when you get to the outside of the eye area. When you get to the 4dc sts that are over the twist, simple sc into each one and then sl st to join the round. Fasten off leaving a 5” tail.

Ignore the Bobby Pins.
Once you have made both eyes, use the excess wire to bind the two eye pieces together. Leave enough space so that the flat spot made from the 4dc’s in Rnd 3 will touch when the eye piece are laid next to each other.  Use the long tails left from binding off to sew 4-8 stitches together at the center between the eyes.


Outside Edge:

Once your eyes have been joined, decide which is the top and which is the bottom. At the bottom center of the nose (with RS facing), join your thread as close as possible to where your line of sewing stitches ends. now the “fun” begins. Please read this all carefully before you begin! (and use the chart to help you!!!)


ROW 1
You’re going to make arches around the edge of the mask. The first/last arch of the round are slightly smaller than the rest so that there is room for them in the space between the two eyes.  You’re also going to vary the use of normal and short arches to fudge it so that you make it all the way around regardless of how many sts you actually have at this point.  I tried putting an arch at the top of the nose and I wasn’t happy with it, so read below for how to “fudge it”. I know it sounds crazy, but it was the look I wanted.
For ALL ARCHES, the finishing sc of the previous arch is also the beginning of the next arch.
First/Last Arch Arch: skip 2 sts, (dc, ch1) 3 times plus one additional dc into following st (for a total of 4 dcs with ch 1’s in between) skip 2 sts and sc into the following st.
Normal Arch: Ch 1, skip 3 sts, (dc, ch1) 4 times into following st, skip 3 sts and sc into following st.
Short Arch: Ch 1, skip 2 sts, (dc, ch1) 4 times into following st, skip 2 sts and sc into following st. (these short arches are best used around the outside of the eyes to help prevent your work from curling excessively).
“Fudging it” Over the top of the nose:
At the end of your last completed arch, sc down the “V” to where you sewed the eye pieces together. Count your sts. Continue to sc up the opposite side of the “V” (onto the other eye piece) for an equal number of sts. Ch 1, and TURN.
Over those sc sts, working back towards the last completed arch, sc2tog, dc2tog, trc2tog, dc2tog, sc2tog. Then sl st to the sc that completed the last arch.  (Depending on how many sts you sc’d, you’ll add more or less of the “2tog” sts, but always make sure you have an ODD number)
After you’re back at the last completed arch, turn, and add an arch over the “2tog” sts from the previous round, and ending with a sc on the first unworked st of the opposite eye piece from where you started.  You may now continue adding arches as you did to the opposite side. Fasten off at the end of the row.

Outline Row 1 - Placement of Different Arches

ROW 2
Try your mask on, and mark one spot on each eye where you want the mask to begin to expand. This point should be between 2 arches on their shared sc st.Because of the shape I wanted, I chose a point directly below the outside corner of my actual eye. Join your thread on the Left eye (as worn) with the RS facing.
Ch 3, *(dc, ch 1, dc, ch 1, dc) into the top center ch 1 st of the next arch. Ch 2, dc into the next sc.* Ch 2 and repeat from * to * until you’re back at the “Fudge” spot on the bridge of the nose. Here, I chose to omit the final ch 2 of the arch, and instead I just did a dc into the sc of the prev rnd.  Into the arch at the bridge of the nose I did (ch 1, dc, ch 1, dc, ch 1, dc, ch 1) and then a dc into the next sc of the prev rnd. Without a ch2, I moved into the pattern to continue the arches. After the last arch of this rnd, ch 3 and sl st to join to the sc of the prev rnd.


ROW 3
Ch 1, (sc, hdc) into the ch 3 space that ended the last row. *(Dc, ch1) into each dc, ch 1, dc, ch1, and dc of the arch made in the prev row dc2tog over the ch2,dc,ch2 between arches, and ch 1* repeat * to * until you’re back at the beginning of the rnd. You may have to fudge a few sts around the bridge of the nose.

ROW 4 - Customizeable
Sc into each dc and ch 1 sp, sc2tog over each dc2tog done in the prev row. Add a small picot (ch 3, sc in same st) between sc sts or a large picot (ch 5, sc in same st) as desired. If you would like to add loops for ribbon (ch 15, sc into same st), I advise doing those in this round, placed over a dc2tog.

Center Picots:
Ch 2, dc into center st of arch, ch 2, sc into next dc st. Ch 1, turn.
Ch 1, 3sc into ch 2 sp, (sc, ch3, sl st, ch 5, sl st, ch 3, sl st) into center dc, 3 sc into ch 2 sp, sl st  to next st, turn.
sl st into the 3 sc’s of the prev row, (sc, ch2, sc) into the small picot, (2sc, ch3, 2sc) into the large picot, (sc, ch2, sc) into the next small picot, and sl st into each of the next 4 sts.
Resume row 4 pattern as before. Fasten off at the end.

Once you’ve finished, I advise using Fray-Check on all of your knots. Weave in all of your ends.
Block, Iron, and Starch your mask! Take time to pin out all of the picots on your piece, if you’re impatient like me, believe me it is WORTH IT to take your time.
Sew on ribbons or glue on a decorative stick-handle as desired. You may want to use a scrap of ribbon, fabric, or crochet swatch to sew on the inside and cover the exposed wires. You can also add glitter, beads, rhinestones, and any other fabulous accessories you so desire! (I didn’t know exactly what I was making when I started, otherwise I would have worked beads into the pattern)


Yarn Note: I’ve completely fallen in love with Aunt Lydia’s Crochet Cotton. The size 10 is easy enough to work with, and because it is 100% cotton, it looks lovely after just blocking it. I highly recommend it for lace projects that need to maintain their shape. Much better than whatever I used on the last mask.


Project Update: The mask looked great at the wedding! I ended up leaving it on the elastic, and it was comfortable/easy to wear with it on my face or on top of my head the whole night. I never even had to think about "Where did I leave my mask?"! So here's a picture of me in my mask and the BEAUTIFUL bride in hers!


To answer some questions from the comments (and in-person): The mask without elastic weighs just over 1 oz, so not very much thread was used. The mask took me about 10 hours total, including the time it took for me to work out the pattern, make pattern notations, block, starch, and sew the elastic. I made the mask on a day off from work, and did the blocking/etc over the next few days. I prefer the Sz 10 thread because it is easier to work with and more sturdy in the end, however sz 30 would look nice too (though would require more pattern modification).

Monday, July 2, 2012

Summer Shirt Re-Fashion

I bought this shirt on-sale a year or so ago, and even though I loved it, I knew that the way the beads had been attached wouldn't last for very long. Hand-washed carefully for a season, it did really well. Then there was Mexico.

On the way home from our trip to Mexico, the TSA searched our checked luggage, and apparently they opened a bottle of tequila that we were bringing back in order to do a chemical assay (and make sure it was really, in fact, tequila). They didn't exactly close the bottle up tight before they re-packed my bag (aka: shoved everything into it randomly) and it leaked out ALL over everything in the bag. Oh, plus that delayed the bag so it didn't even get on our flight, but anyways....

The lovely beaded shirt got thrown into the washer, with everything else from the bag...oops. Unfortunately, it did not survive its adventure through the washing machine. "But its such a cute shirt!" I thought to myself, "and its so comfy to wear in the summer!"

So, I opted to remove all the beads and start fresh. Lucky for me, the beads were sewn onto a tulle-like mesh fabric, and THAT was then stitched onto the shirt, and just around the edges. Easy-as-pie to remove it and the beads were then cut off and donated to my sister for jewelry-making purposes. I had some black, cream, and baby-pink lace-weight in the house (Aunt Lydia's Crochet Cotton Size 10) and I decided on black for better contrast. The challenge became trying to make a lace piece that fit the odd shape left behind. 


 I ended up making 5 seperate pieces that were sewn together as appliques onto the shirt. (see above left image) The center hexagon and its partner squares all came from Beyond the Square Crochet Motifs and the longer pieces are just 2 rows of dc sts with a shell border around the outside edges. I'm very pleased with how this turned out, and it gave me a great excuse to finish up another lace bracelet to match!


Thursday, June 7, 2012

Pretty Little Sunhat

So, I recently did a few projects with lace, and became completely obsessed with it. I love the way it looks when I finish a piece, like something you would easily find with a high price tag at a boutique. No, I still haven't started that veil, and yes, the projects take about 10 times longer than their worsted weight counterparts. That said, I love the fact that a ball of crochet thread (along with the accompanying project) fits in my everyday purse instead of a separate yarn bag. That said, I managed to lose the 1.5mm crochet hook frequently. So I now carry a hook case with me as well, instead of just tucking it into the skein.

Anyways, this beautiful little Sunhat Pattern is one that I found through Ravelry. It was very accurate as far as sizing went. I used a larger hook, so I omitted one round of the center hat circle. It is sized for 1.5-3 year olds, but since it was a gift for Scarlett's first birthday I wanted to keep as close to that sizing as possible.

Yarn: Aunt Lydia's Classic Cotton Crochet  Thread (size 10) in Orchid Pink
Hook: 1.5mm metal lace hook
Pattern Link: Sunhat PDF
Modifications: I omitted one row of the center circle, and I don't recall which one. I also finished it off early, since I made the shell pattern rows longer than required. I don't think I deliberately planned any of that, I think my fingers were killing me and I just gave up. I worked on it for about 4 hours straight while on a flight layover in Atlanta. Besided, the little flowers on the edge look so cute the way they are!


The Verdict: I love it! Can't wait for Jennifer to get some nice pix of Scarlett wearing it!

And here it is!!! So CUTE!!!


Friday, April 20, 2012

Heirloom Lace Sampler Bracelet


See this post for the story behind the sampler.

If you’re looking to make this lovely cuff bracelet, please be aware that this is NOT A BEGINNER PROJECT. I’m assuming that you’re already familiar with all basic crochet stitches and skills, and that you have at least some experience making lace. I wrote the pattern AFTER finishing the piece, so if you need to fudge the last stitch or two in a row, don’t be surprised.

Thread: Aunt Lydia’s Crochet Cotton Size 10 in Ivory
Hook: 1.5mm metal lace hook
Notions: 2 small buttons, sewing needle, and matching ivory sewing thread

Begin with a multiple of 8 +1, you want the base chain to be enough to reach around your wrist.

Row 1: Sc in 2nd ch from hook and in each st across. Turn
Row 2: Ch 6, *skip 3 sts, dc2tog in next st, ch 3 and skip 3 sts, dc in next st, ch 3* Repeat from * to * until the end of the row. Turn
Row 3: Ch5, *in the top of the dc2tog from prev row (dc2tog, ch 3, dc2tog), then ch 2 and dc in the top of the dc from the prev row, ch2* Repeat from * to * until the end of the row. Turn.
Row 4: Ch 1, sc in same st *(ch1 + dc) four times into the ch 3 space between the two dc2tog sts (shell made) in the previous row. ch 1 and sc in the top of the next dc from prev row*  Repeat from * to * until the end of the row. Turn.
Row 5. Ch 5, *in the center ch1 space of the shell made in the prev row (dc, ch1, dc, ch1, dc), ch 2, dc in the sc of the prev row, ch 2* Repeat from * to * until the end of the row. Turn.
Row 6: Ch 3, *dc in the first dc of the shell, ch 1, dc in the first ch 1 sp of the shell, ch 1, dc in the 2nd dc of the shell, ch 1, dc in the 2nd ch 1 sp of the shell, ch 1, dc in the 3rd dc of the shell, ch 1, dc2tog over the next ch2 spaces, ch1* Repeat from * to * until the end of the row. Turn.
Row 7: Ch 1, sc in each of the next dc, ch, dc, and ch sts. *In the dc that is the top of the shell (sc, ch3, sc) to make a picot. Sc in each of the next ch, dc, and ch sts. Sc2tog over the next 2 plain dc sts, skipping over the ch, dc2tog, and ch sts. Sc in each of the next ch, dc, and ch sts.* Repeat from * to * until the end of the row. Turn.
Row 8: ch 4, dc in same st. *ch 7. In picot st from prev row (dc, ch1, dc, ch1, dc)* Repeat from * to * until the end of the row. Turn.
Row 9: ch1, sc in same st. *(4dc, ch1, 4dc) all in next ch 7 sp. Sc in each ch 1 space between the dc’s in the picot* Repeat from * to * until the end of the row. Turn.
Row 10: ch 5, *In ch 1 sp at top of loop (puff st, ch 2, puff st), ch 3, dc2tog over the sc’s from prev row, ch 3* Repeat from * to * until the end of the row. Turn.
Row 11: Ch 1, *4sc in each ch 3 sp, and (2sc, ch3, 2sc) into eac ch2 sp between puff sts.

Finishing: turn your work 90 degrees and working back towards Row 1, add a row of sc along the edge of your lace. You may add as many rows as needed on each edge in order to make room to sew on buttons and create button holes.

To make button holes: Hold your button up to the work and measure how many sc’s wide your buttons are, and call this number W. Determine how you will space your buttons. After an initial row or more of sc sts on the edge of your lace, sc in each st across, stopping where you want the button, and ch W sts. Skip an equal number of sts, and continue to sc across. You’ll need to add an additional row of sc’s on top of your button hole row. For this row, sc in each sc, and W+1 sc’s in each ch sp. Fasten off.

I like to add a dot of fray-check onto any place where the thread is knotted or tied in, just to make sure it doesn’t get away, and then I weave in my ends.

BLOCK AND STARCH
your lace. Did I mention that you should block and starch this??

You could make this longer and wear it as a choker, and I think it would be a lovely gift for a bride-to-be!


Wednesday, April 18, 2012

Lace is Lovely

So I recently bought a new book on Crochet Borders. I'm always looking for inspiration on how to edge the baby blankets which never seem to end. (Seriously, I've hit the phase of life where everyone is getting pregnant on purpose!)

Its a great book, and its given me some excellent inspiration. As if there weren't enough projects on my to-do list, I got the chance to put together a beautiful lace sample swatch.

So my plan is to use the edging on a heirloom bridal veil. I think that handmade lace on the edge of a simple oval veil would make a lovely hand-me down that could stay in a family. It was a request for someone, and I wasn't sure if I could do it until I made a sampler.

I love it. I'm just not sure if the narrower, simpler version wouldn't make a more subtle edge. I'm undecided.

Either way, the sample swatch is going to have some buttons added to one side, and some button holes on the other, so my sister can have it as a cuff-bracelet.

In the meantime, I've got myself started on another afghan (ugh), I've got to put the finishing touches on a baby sweater (need to go buy buttons), and I'd like to start doing more lace-work since I find it absolutely stunning.