Showing posts with label sewing. Show all posts

Wednesday, September 24, 2014

The Purse of Many Pockets

The new purse!
So, I should have published this months ago, but I've been busy. I needed a new purse and I just couldn't find one that I liked with the right amount of pockets/dividers and the right price. I hate throwing my phone in my purse and having it ring and ring and eventually go to voicemail while I dig around trying to find it.

"I just put you in here! How are you on the bottom already!"

Anyways, I decided to venture again into the world of sewing and make my own purse. I found this free pattern online and decided to run with it.

I added an extra pocket on the end so that both ends have an elastic pocket, and I omitted one of the side pockets. Inside, there is the big zipper pocket and a plain pocket on the opposite side that I made large enough to hold my kindle. I didn't use a pleather bottom, just more of the same fabric I had, and I did construct it a bit differently by sewing the ends onto the bottom and THEN sandwiching on the sides.

My straps are also longer, since I like wearing my purses cross-body for walking through the grocery store. Both of the D-rings are on the same side, so that I could get longer straps, and so that I can put my keys there. D-rings are really pointless though, plain circles would have been better.

I also added a zipper on top instead of a magnet clasp because my purse loves to jump off the front seat of my car and dump out everything onto the floor.      No. Bad purse.

Anyways, here's more pictures of the finished product!


Closer view so that you can see all the pockets!

 
Outside Elastic Pocket
Inside Elastic Pocket

All of the Inside Pockets (4 total, 2 elastic, 1 zipper, + kindle pocket)


Monday, December 30, 2013

Quiet Books for Kids

So this what my giant undertaking for Christmas. I decided to make quiet books for my niece (age 5) and my nephew (age 2). I love giving quiet entertain-yourself gifts to kids, and of all the ideas, this one seemed the best for travel also. I don't have kids, so I did a lot of guessing and research to figure out what would be best for the kiddos, and I learned alot.

All of the books are grommetted and then joined with those metal embroidery loops, so that pages can be added, removed, or exchanged as the kid grow in and out of things, or as pages need repair.

For the 5-year old, some things detach from the book, but have a storage space in one of the pages. For the 2 year old, everything is tied down.

Ok before we get into the pictures - Things that I learned:

#1 - Grommets only go through 2-3 layers of felt. I should have done the decorating on MOST of the page, but left a border for the binding only.

#2 - Sew EVERYTHING on. I glued a bunch of things to save time and energy, and those were the first things that got ripped out of the book. Oops. Live and learn I guess. Most of them were decorative elements more than anything, but if I could do it all over, I would just reduce the number of pages and sew every last thing.

#3 - Page size consistency! I bought packs of felt as well as individual sheets. I also cut  some from larger sheets of plastic and/or felt. Even though all of them were *supposed* to be 9"x13" - the only ones that were actually sized right were the ones I cut out. A template that was 8.5"x11" (with a 1" margin for binding) would have saved me SO much trouble in the end. But I didn't find out until I went to bind the books, and by then it was too late.

Ok, so here are the books!

Sophia's Cover Page!
The books velcro shut.

I-Spy Page
Made of plastic scraps I had and filled with beads, buttons and glitter.
I took a photo of everything and included a "find me checklist" in the book.
Inspiration Book


Everybody needs practice tying their shoes!

Clock Page & Telling the time!


Garden Pages

Flower Garden
The petals are individually button-holed and she can mix and match them.
Inspiration Image

Veggie Garden Page
The carrots are tethered in with ribbon but they can be harvested!
Inspiration Page
Dress Up Page
Pattern Here

Kitchen Page 1
The Grocery Bag holds all the food cut-outs.
Pattern page


Kitchen Page 1
to show the frying pan and eggs!

Kitchen Page 2
The plate, napkin, and silverware are sewn/glued down.
Pattern Page

Sandcastle Page 1
The pieces are stored in the bucket.
Pattern Page

Sandcastle Page 2
Pattern Page


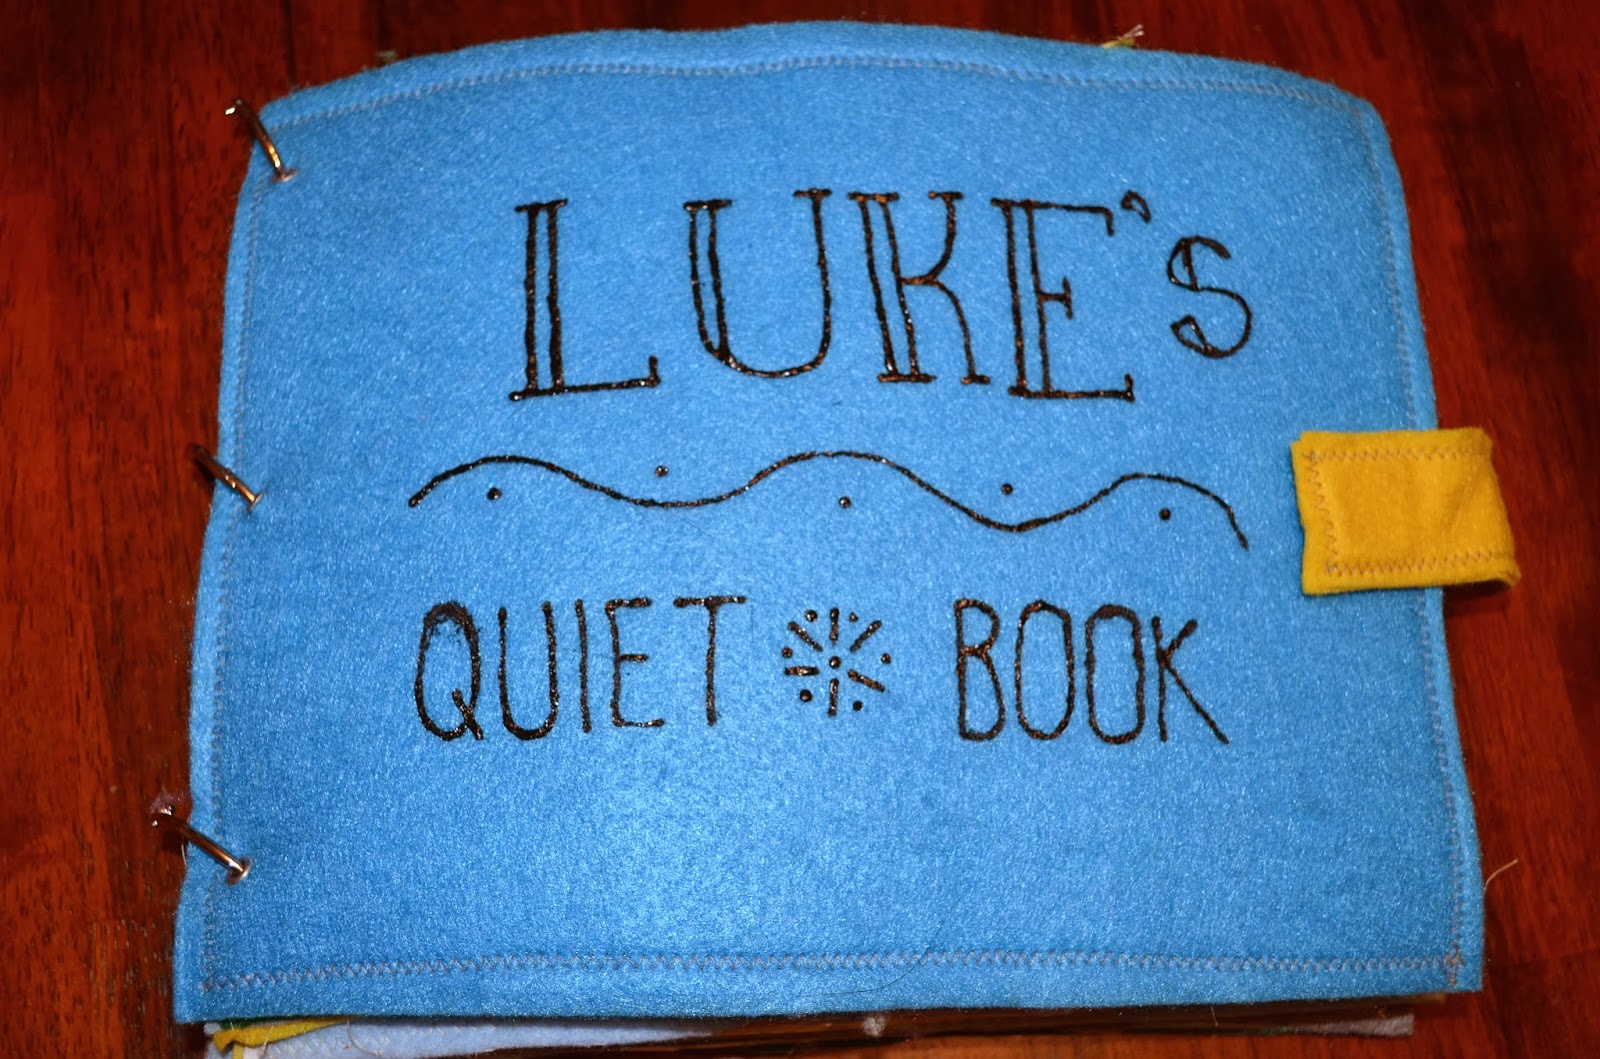
Luke's Cover Page
Lion Page
I really didn't get this, but I saw it in a number of places.
As it turns out, Luke was captivated by this page!
Inspiration, Another Inspiration
Bead Page
I double stitched each end of each strand, plus the border!
Inspiration


Buttons Page
Inspiration
 
"Touch and Feel" Page
This page started out with a spare piece of trim, and I added the pom-poms to bring it together.

Shapes Page Inspiration

Zipper Page
Inspiration, Inspiration, and more Inspiration

Froggy Page
The flies are made of the fluffy part of velcro.
The loops/tough part is on the other side of the frog's tongue.
Inspiration Page

Matching the Socks Page
I don't remember where I got the idea for this one, but the socks are
tied down inside the basket.

Airport Page
The kids know that Uncle works at the airport, so Luke got this page.
I used the pattern provided on this site, and added the person too.
Because this is the baby's book, everything is attached.
Roads Page
I saw roads pages in other places, like here but I didn't like them.
I added this one at the end. I got the cars and tied the ribbon onto the underside.
Then I glued velcro to the car and to parking spots on the page.
I don't know if you can see, but I sewed the roads down with yellow lines down the middle.

Thursday, January 3, 2013

Home Sweet Dollhouse


So for Christmas this past year, Ryan and I teamed up to make his (almost) 4 year old niece a dollhouse. I've seen quite a few tutorials out there on how to make a "bookshelf" dollhouse or something similar, so I tried to pull from those ideas and make little miss Sophia something really original, fun, and safe to have in the house with her baby brother. (No itsy bitsy pieces).

The House
Ryan was in charge of this part, and he made it all from scratch instead of using a bookshelf to start with. The main part of the house is 24" tall by 24" wide by 8" deep. The roof is 12" tall. The chimney was added for additional support, and there is a piece of trim to bridge the gap on the back where the back of the roof meets the back of the main house. We primed the whole thing white and then used a nice semi-gloss trim paint. The back wall of the 4 main rooms are painted with acrylic paint, and the back wall of the attic is "wallpapered" with a piece of 12" square scrapbooking paper cut on the diagonal, and glued with Elmer's glue.

The Furniture
Buying this from the store can be expensive, and as beautiful as those pieces are, they are NOT sturdy. I know this from experience. So instead, I wanted to make Sophia things that she could really play with, and yet nobody would be upset when things eventually break, as all toys tend to do. I hit the wood crafts aisle at Joann's and picked up a couple big pieces of 3/8" thick balsa wood, some 1" wooden cubes, and some 4" and 6" pre-made plaques. I used an xacto knife to cut the balsa to the correct size. You're also going to want some wood glue, medium grit sand paper, and a couple of clamps if you can find them.

The chairs are each made of a 1" wooden cube and a 1" wide piece of balsa wood, simply glued and painted. 
The kitchen table is all balsa wood, with 2 interlocking squares of balsa as the base. This was tough to get level though, so be prepared for some sanding. The beds are a combination of balsa wood and the wooden plaques. Ryan cut these for me on the table saw, but you could do it with a hand saw. the twin beds got the plaques cut short-ways and the king bed is cut long-ways. The frame of the bed itself if just 3 pieces of balsa wood, glued together and then to the headboard/footboard made from the wooden plaques. The clamps were handy for this part, but left impressions in the soft balsa wood, so maybe add a piece of cardboard or something to protect it. We painted the beds white just like the house, and I sewed little sheets and pillows out of some 1/4 yd pieces I got on clearance at Joann's. I pressed the edges of the sheets so that they would bend over the edges of the bed, and I feel like this really made the difference.

The couch is made from yet another plaque, cut longways. I built the seat out of balsa wood and sanded it to make the edges rounded after the glue was very dry. Balsa sands very easily, so it should be quick to get the edges rounded. The coffee table is just balsa wood again.
The toy chest in the attic is just a box that I bought from the woodcrafts aisle at Joann's and painted. It makes a nice place to store all the little items.

The Decorations
This was the most fun. The fireplace and the kitchen counters/fridge are all just images that I found online and printed off. I glued them to the back wall, and voila! I also added a dresser & mirror to the one bedroom, a plant & rug in the living room, and some family photos! The frames in the living room are actually scrapbooking stickers. The other photos just have a white border around them. I also did some printable miniatures for the cereal boxes and games. They're just paper and they were free, so nobody is going to be upset if they get lost. Check out Jennifer's Free Miniature Printables, and Jim's Dollhouse Printables.

We did buy the actual dolls and the Christmas tree from the little dollhouse store in Plymouth. Other than that, the whole thing was DIY! Please check out some of these other great blogs/sites that I used for Inspiration!

The Homemade Dollhouse
The DIY Dollhouse by The Busy Budgeting Mama
The Neapolitan Dollhouse by Simply Kierste

Friday, October 5, 2012

Boba Fett Fleece Hat Pattern


This is the second hat I've put together for the Star Wars event I'm doing with my local craft group. And what better character to focus on than Boba Fett! Enjoy!


Step 1: Download the Images and print to 8.5"x11" (you may have to scale things)
Step 2: Cut out the paper pieces to serve as your pattern
Step 3: Aquire Fabric/Materials

You'll Need:
1/2 yds Green Fleece
1/2 yds Black Fleece
Scraps of Red Fleece
Coordinating threads (I used Black and Grey)
Sewing Needle or Machine

Step 4: Pin the paper pattern pieces and cut out the fabric. Check which direction your fabric is the most stretchy, and use the indicator arrows to help line up your pattern for maximum stretch-ability.
For the "Earflap Band" use Green Fleece. You'll either fold the fabric, and place the indicated edge up to the fold, or cut 2 mirror imaged pieces out, leaving about 1/4" extra seam allowance at the edge that says "Fold". This should be white. If you're going to line your hat (which I highly advise) repeat this cutting on the fabric that you'd like to line the earflap band. (I chose white fleece again)
For the "Crown" piece, cut 6 identical pieces from the green fleece. If you're lining your hat, cut another 6 pieces out of the lining fabric (I used Black fleece for the lining).

Now, take one of the green “Crown” Pieces that you had cut out. This will be your front panel. Take the “Front Panel Cut-Out” and line it up with the bottom edge and sides as indicated. Cut along the lines and trash the green cut out.  Take the “Front Panel Cut-Out” pattern piece again, and cut out a piece of red fleece.  Keep these pieces together with a pin, or sew them immediately.

Take 2 more green “crown” pieces to be your side panels. Line the “Side Panel Cut out” Pattern piece up with the green “crown” pieces, as high up as you can before the piece starts to taper to a point, This should line up with where you cut out the piece on the front panel, approximately. Cut out the “Side panel cut outs” and trash that piece of green fleece. Then use the same pattern piece, to cut two rectangles from red fleece. Pin the 3 pieces that make up each “side panel” together, or sew immediately.
Cut out the applique pieces from black fleece.

Step 5: Assemble the 4 pieces of your front panel, and the 3 pieces of each side panel. Make sure to have right-sides facing when seaming any 2 pieces together. Next, take the black Applique pieces, and top stitch them on top of the red fleece. The red and black fleece might hang over the edges a bit, and that is fine.

Step 6: Assemble the crown by taking the front-panel and one side-panel and placing them right-sides together. Stitch up the pinned side towards the point. Repeat this with the other side panel. After these 3 panels are assembled, grab another crown piece, put it right-sides together with one of those pieces, and stitch again. Always make sure you have right-sides together, putting your seams on the wrong-side. Repeat this process until all 6 pieces of the crown are connected and make up the top of the hat.
Next, Take your earflap band and fold it in half with right-sides facing (or if in 2 pieces, simply place right-sides together). Seam up the short end(s).
Now, place your completed crown piece into the completed ear-band, with right sides facing. Make sure to line-up the back seam of the earflap band with the center of the back panel of the hat. The ear-flap parts should be facing away from the seam you're about to sew. Stitch the ear-flap band all around, connecting it to the crown.

Voila! You just made a hat! If you're going to make a lining, repeat step 6  for the assembly of the crown panels and earflap band.

Step 7: Attach the lining. Turn the outside of the hat inside-out, and add the lining inside of it so that the right-sides are touching. Pin all around the earflappy side of the ear-flap band. Begin stitching about 1" to the right of the back seam, and stitch all the way around until you are about 1" from the back seam again. Use this gap to turn the hat right-sides out. Tuck and tug until it looks like a hat again, and then stitch your gap closed.

Step 8: Enjoy your super-awesome Boba Fett Fleece Hat!!!


Thursday, October 4, 2012

R2D2 Fleece Hat Pattern

Yes, Ladies and Gents, here it is! Since everyone want to wear a hat fashioned after their favorite droid, I've got the pattern for you!


Step 1: Download the Image and print it 8.5"x11" (you may have to scale things)
Step 2: Cut out the paper pieces to serve as your pattern
Step 3: Aquire Fabric/Materials

You'll Need:
1/4- 1/2 yds White Fleece
1/4yds Blue Fleece
Scraps of Red Fleece
Scraps of Black Fleece
Coordinating threads (I used Black and White)
Sewing Needle or Machine

Step 4: Pin the paper pattern pieces and cut out the fabric. Check which direction your fabric is the most stretchy, and use the indicator arrows to help line up your pattern for maximum stretch-ability.
For the "Earflap Band" use White Fleece. You'll either fold the fabric, and place the indicated edge up to the fold, or cut 2 mirror imaged pieces out, leaving about 1/4" extra seam allowance at the edge that says "Fold". This should be white. If you're going to line your hat (which I highly advise) repeat this cutting on the fabric that you'd like to line the earflap band. (I chose white fleece again)
For the "Crown" piece, cut 6 identical pieces from the white fleece. If you're lining your hat, cut another 6 pieces out of the lining fabric (I used Blue fleece for the lining).
Cut 3 circles out, 2 in black fleece and 1 in red fleece.
Cut your squares/rectangles out of blue fleece. I used the pattern piece to cut 2 square-ish pieces and 2 smaller rectangles (though I only ended up using one). I also cut 2 rectangles that were approx 2"x4".

Step 5: Assemble! Take 2 of your crown pieces, and place them right-sides together, and stitch up one side up towards the point. Grab another crown piece, put it right-sides together with one of those pieces, and stitch again. Always Make sure you have right-sides together, putting your seams on the wrong-side. Repeat this process until all 6 pieces of the crown are connected and make up the top of the hat.
Next, Take your earflap band and fold it in half with right-sides facing (or if in 2 pieces, simply place right-sides together). Seam up the short end(s).
Now, place your completed crown piece into the completed ear-band, with right sides facing. Make sure to line-up the seams at the back of the hat. The ear-flap parts should be facing away from the seam you're about to sew. Stitch the ear-flab band all around, connecting it to the crown.

Voila! You just made a hat! If you're going to make a lining, repeat step 5 all over again with the lining pieces.

Step 6: Decorate! Take the outside of the hat (as opposed to the lining) and pin on all of the Applique pieces that you want to use. You can either top-stitch these on with a machine (I did this using black thread) or hand-stitch them on.

Step 7: Attach the lining. Turn the outside of the hat inside-out, and add the lining inside of it so that the right-sides are touching. Pin all around the earflappy side of the ear-flap band. Begin stitching about 1" to the right of the back seam, and stitch all the way around until you are about 1" from the back seam again. Use this gap to turn the hat right-sides out. Tuck and tug until it looks like a hat again, and then stitch your gap closed.

Step 8: Enjoy your super-awesome R2D2 Fleece Hat!!!

Want it in a different size? Here's how to custom size it!!!

Measure around your head, just above the ears. Use this number as your circumference or "C", mine was 22". Measure from the top of where the hat will be on your head, down to your hairline. This will be your depth or "D", mine was 6". Now measure how tall your ear is, thats going to be "E", and mine was about 3".

See where my pattern has 11" for the width of the earband (when folded in half)? That measurement for you should be 1/2 of C. For the height of the earband, use E, and for the ear flap portion, use E plus 1-1.5".

If you take C and divide it into 6 equal segments, adding a smidge for seam allowance, you'll get the width of each crown piece (Mine was 3.5"). Use D to determine how tall your crown pieces should be, and make sure the top point is always 60 degrees. I found 60 degrees by taking a circle, folding it in half, then folding it into thirds. Each of the 6 slices is a 60 degree angle, and you can trace this to make the top of the point.

The applique pieces aren't very specific for size, so see if they still fit. If not, its very easy to trim them down or simply add more!

Monday, May 14, 2012

Swimsuit Cover-Up


Saw a swimcuit cover-up on pinterest a while back. Various tutorials (Like this one) are now floating about on how to make one. I figured I'd give it a go.

Problem #1 was not being able to find an affordable fabric that I liked. I wanted a knit, but I couldn't find any solid colors that made me happy. Eventually, I settled on a knit that didn't have anywhere near enough stretch to it, but TOTALLY matched my favorite polka-dot bikini top.


Overall, I took a 1.5 yd rectangle of fabric and draped it around. The upper corners were trimmed off and made way for the straps, and I hemmed the bottom with a rounded shape. I'm not a huge fan of how the top fits in the middle, but I tried it with the straps shorter, and it didn't want to behave in terms of covering the "girls", so I opted for a longer strap that would keep me better covered.

I'm super excited about my trip to Mexico at the end of the month! Hence the fact that I didn't want to wait around to find the perfect fabric. (This was clearance, at $3/yd). However, knowing how simple this was to make, I'd definitely be willing to try my hand at another one, and I'll keep my eyes on the clearance racks and remnant bins.

Thursday, May 3, 2012

The Struggles of Sewing

So, once upon a time, I was a seamstress.
Not a good seamstress, but adequate.
I made halloween costumes, theater costumes, cosplay costumes, renaissance costumes....pretty much anything that was designed for costume-wear as opposed to real-world wear. Costumes can have a wonky seam here and there, plus you're only wearing them once or twice.

Mainly, the issue with me is that I HATE ironing. And "press seam flat" is every other step in making an actual garment. Bleh.

Anyways, I finally got my new sewing machine set up at the new house, and I decided to sit down and play with it. WHAT A NIGHTMARE!!!! It has been absolutely terrible getting the tension to cooperate, and the only solution I have found is to scratch the bobbin completely and spool up a new one. When it works, it works great, but the littlest thing seems to set it off into "top thread tension" land, and I'm stuck making up a new bobbin. Did i mention that I hate that part too?

Anyways, whilst fighting the tension and getting used to the machine in general, I decided to make up a couple of "I don't care how this actually ends up looking" projects, that are more about function than appearances. Ya know, something to play with stitches and tension before actually making something to show to the public. (despite the fact that i'm totally posting pictures for the whole wide internet to see my shame)

Project #1 - Old t-shirt turned rice pack. I used this pattern which I found on pinterest. Obviously mine didn't turn out half as nice. I also couldn't get the tension right on my machine to stay correct for a single freaking seam. Argh. I did plan to top-stitch the whole thing before I started adding the rice and seams, but I was so frustrated!

Project #2 - Yoga Pants refashioned from a t-shirt. Finally got the tension working right, and these guys even looked good. Used this tutorial to make the pattern from an existing pair of yoga pants, and this tutorial for how to use a t-shirt as my fabric. Problem: My t-shirt was nowhere near as stretchy as the pants I used to make the pattern, and the finished product was about 4 sizes too small. Boo.

Project #3 - Pincushion. And yes, I know how godawful it looks. I wasn't exactly concerned about it at the time. I wanted to start working on my swimsuit cover up, and my pin container dumped itself out, so I made this out of frustration. It is a strip of 1" elastic to go around my wrist and a remnant of t-shirt sleeve from the yoga-pant fiasco. It may look ugly, but it serves its purpose.


Project #4 - swimsuit cover-up. At least this one was a success! Pictures and details to follow whenever I actually get a chance to wear it!

Tuesday, November 1, 2011

Living Statue Costume

As part of our haunted house this year, we wanted a living statue out front as a "mild" scare and to help pass out candy. We also wanted it to be very cheap.


The dress was made from 4 yds of clearance gray fabric I got for $3/yd at Joann's. It was folded in half, and I cut the sleeves without any scrap. (see diagram)
Fabric is folded in half long-way, and draped over the shoulders.
Cut along the red lines, and sew along the blue lines, with the right sides togther.
Measure room for shoulder and chest before cutting.


The belt was then braided from approximately 75 yards of yarn left over from my wig yarn. (15 pieces of yarn, 5 yards each)

I cut off about 4" all around the hem, and added that to the wooden base (made from scrap wood) that I was going to stand on.

I set the dress, belt and candy bowl (which is set on an up-side down round trash can we had in the garage) on the stand and attacked it all with 2 different shades of grey spray paint. ($4 per can from Lowes)

The make-up was cheap grease paint from the halloween store. I had some already in my kit that I purchased last year.


Total Supplies: $12 in fabric, $8 in spray paint, $3 in yarn, scrap wood, make-up, and old trash can with old bowl to hold candy.

See my most recent post for the pattern on how to make the yarn wig.