Wednesday, January 22, 2014

Tea Dye for Crochet Cotton

Those of you who follow my blog may be familiar with the ongoing saga of my crochet lace veil. I posted some of the samples I made here and here, and I have outlined my progress in photos over here on imgur.

To catch you up on things, I decided to crochet the lace to go around my bridal veil, and I've been working away on this for about a year, if not longer.

Well folks, this past Saturday, I finished the lace! 18.5 FEET of beautiful Sz 20 lace.

Except that the lace is white, and my dress is ivory. So I needed to tea dye it to match my dress.

Now, I had never tea dyed anything before, but I did have a sample of fabric from my dress shop, so that I could at least have a goal color to work off of.

I read about tea staining over on Dahlhart Lane blog, and I decided to use some of my old lace samples to run some tests.

I used 1 teabag for 2 cups of hot water. With the teabags and the lace all in a mason jar, I added the water and shook it all up. For the record, teabags EXPLODE when you shake them in a mason jar. Don't do what I did.

I removed my lace samples after 5, 10, and 15 minutes in the tea bath. Anticipating that they might be darker when wet, I waited for them to dry before comparing them to my dress fabric.


Once I knew the time I needed (5 minutes or less) I washed up my veil lace. I wanted to get rid of any residual oils from my hands, and any incidental dust or dirt. I was SHOCKED at how dark the water got. So GROSS! So I washed and rinsed the lace (using a dab of dish soap) three times total, just to be sure.
Finally it was all nice and clean again!


I prepped my bowl by adding 3 teabags and 6 cups of hot water, but I let the tea steep for a few minutes and then I removed the teabags. I was SO nervous about dunking my lace into the tea! All that hard work! But I set the kitchen timer for 4 minutes and placed it into the tea bath. After 4 minutes, the lace matched my dress sample fabric perfectly. Knowing it would dry a little lighter, I gave it another 30 seconds in the tea bath before I pulled it out and rinsed it. After a thorough rinsing, I washed it with a dab of dishsoap and laid it out to air dry. I chose not to block it at this point because, dear LORD, can you imagine pinning all of that. NO. no no no no no.


Once it was dry, it was a big ugly wad of creamy ivory. I got to work ironing it. This was the most amazing part. Time consuming, but amazing. It was so great pulling this ugly wad of material, pressing it, and having this lovely bit of lace appear on the other side!


So it is crochetted, dyed, pressed, and ready to be sewn onto tulle. I'm going to try and work with some family this weekend to get it completely finished!!!

Friday, January 17, 2014

Thick and Quick Baby Blanket

So my one of my cousins is due with a baby girl, and had her shower this past weekend. She said her nursery theme was pink and brown, and I sent her this blanket for it :)

This is the second time I have used this pattern, and I adore it, especially when worked with a super-bulky or a double-strand of yarn.

Pattern: Stashaholic's Brain Dead Afghan
Yarn: Loops & Threads Impeccable in Neopolitan (2 of their "Big" Skeins, held 2 strands together as one)
Hook: 10.0mm
Pattern Notes: Made my starting Chain of 96 sts. Worked until I started to run low on yarn, then added the tassels on the ends of the zig-zags. The tassels were a suggestion from Grandma, and I honestly think that they are so cute. They really make this blanket unique!


PS: My Hubby got me a new camera for Christmas! Its a Nikon DSLR and I am so happy with the beautiful pictures of my projects!

Monday, December 30, 2013

Quiet Books for Kids

So this what my giant undertaking for Christmas. I decided to make quiet books for my niece (age 5) and my nephew (age 2). I love giving quiet entertain-yourself gifts to kids, and of all the ideas, this one seemed the best for travel also. I don't have kids, so I did a lot of guessing and research to figure out what would be best for the kiddos, and I learned alot.

All of the books are grommetted and then joined with those metal embroidery loops, so that pages can be added, removed, or exchanged as the kid grow in and out of things, or as pages need repair.

For the 5-year old, some things detach from the book, but have a storage space in one of the pages. For the 2 year old, everything is tied down.

Ok before we get into the pictures - Things that I learned:

#1 - Grommets only go through 2-3 layers of felt. I should have done the decorating on MOST of the page, but left a border for the binding only.

#2 - Sew EVERYTHING on. I glued a bunch of things to save time and energy, and those were the first things that got ripped out of the book. Oops. Live and learn I guess. Most of them were decorative elements more than anything, but if I could do it all over, I would just reduce the number of pages and sew every last thing.

#3 - Page size consistency! I bought packs of felt as well as individual sheets. I also cut  some from larger sheets of plastic and/or felt. Even though all of them were *supposed* to be 9"x13" - the only ones that were actually sized right were the ones I cut out. A template that was 8.5"x11" (with a 1" margin for binding) would have saved me SO much trouble in the end. But I didn't find out until I went to bind the books, and by then it was too late.

Ok, so here are the books!

Sophia's Cover Page!
The books velcro shut.

I-Spy Page
Made of plastic scraps I had and filled with beads, buttons and glitter.
I took a photo of everything and included a "find me checklist" in the book.
Inspiration Book


Everybody needs practice tying their shoes!

Clock Page & Telling the time!


Garden Pages

Flower Garden
The petals are individually button-holed and she can mix and match them.
Inspiration Image

Veggie Garden Page
The carrots are tethered in with ribbon but they can be harvested!
Inspiration Page
Dress Up Page
Pattern Here

Kitchen Page 1
The Grocery Bag holds all the food cut-outs.
Pattern page


Kitchen Page 1
to show the frying pan and eggs!

Kitchen Page 2
The plate, napkin, and silverware are sewn/glued down.
Pattern Page

Sandcastle Page 1
The pieces are stored in the bucket.
Pattern Page

Sandcastle Page 2
Pattern Page


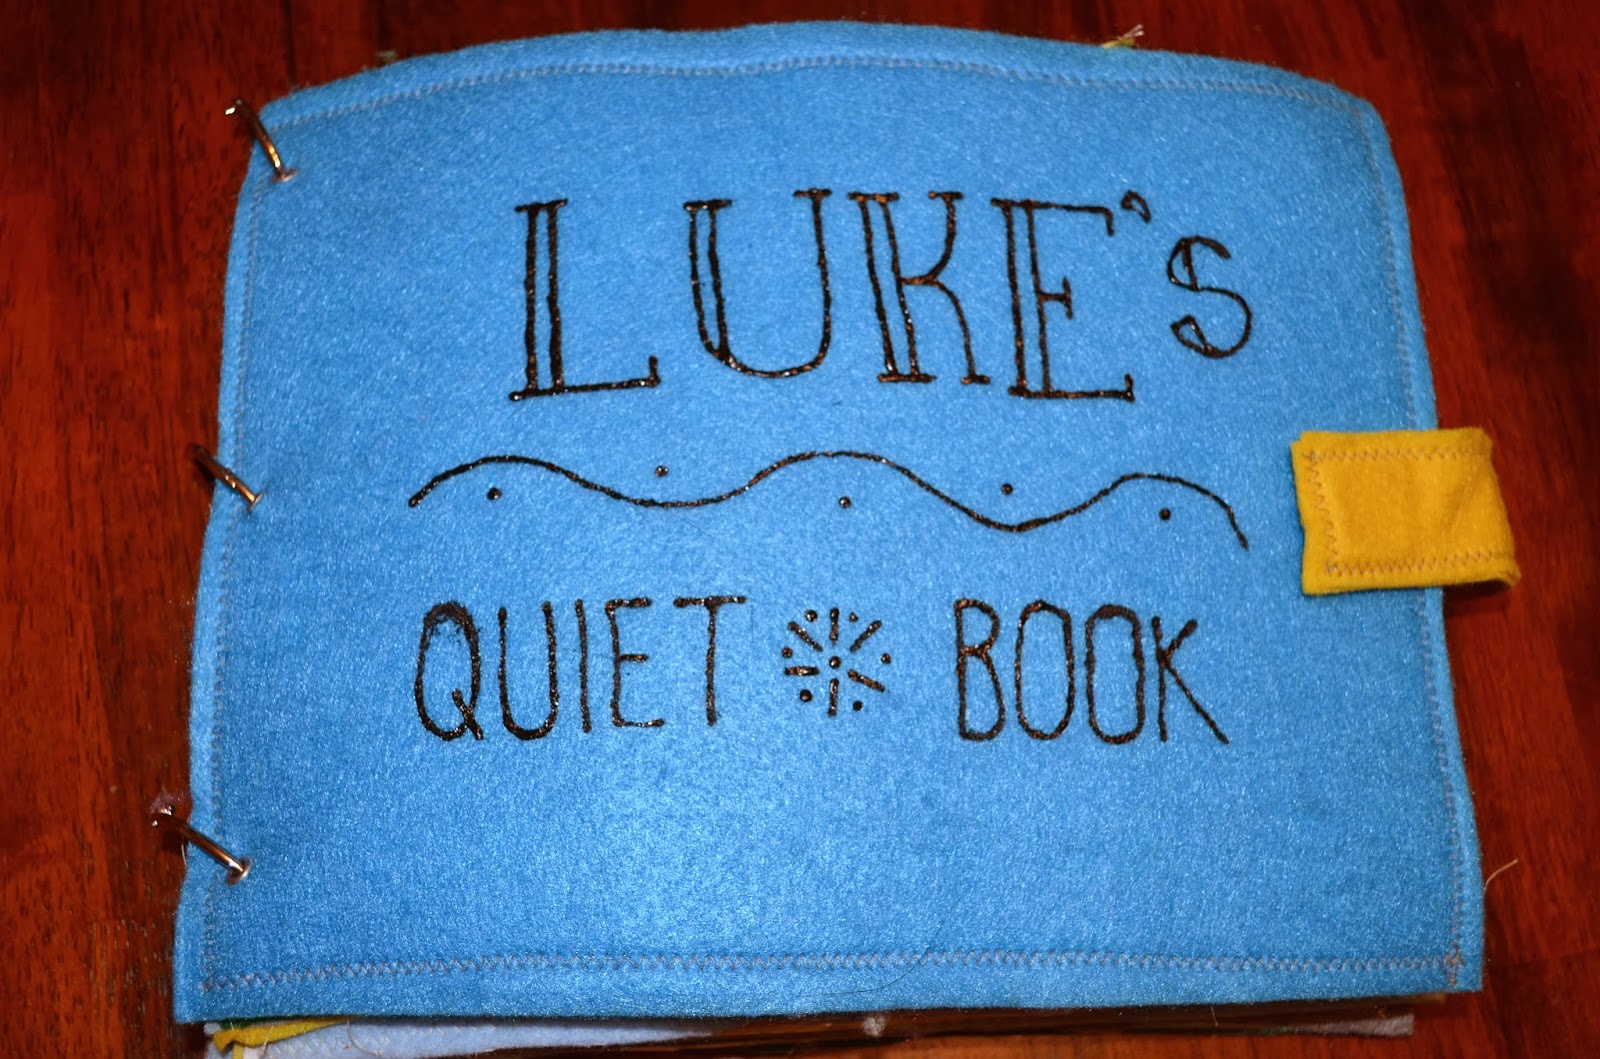
Luke's Cover Page
Lion Page
I really didn't get this, but I saw it in a number of places.
As it turns out, Luke was captivated by this page!
Inspiration, Another Inspiration
Bead Page
I double stitched each end of each strand, plus the border!
Inspiration


Buttons Page
Inspiration
 
"Touch and Feel" Page
This page started out with a spare piece of trim, and I added the pom-poms to bring it together.

Shapes Page Inspiration

Zipper Page
Inspiration, Inspiration, and more Inspiration

Froggy Page
The flies are made of the fluffy part of velcro.
The loops/tough part is on the other side of the frog's tongue.
Inspiration Page

Matching the Socks Page
I don't remember where I got the idea for this one, but the socks are
tied down inside the basket.

Airport Page
The kids know that Uncle works at the airport, so Luke got this page.
I used the pattern provided on this site, and added the person too.
Because this is the baby's book, everything is attached.
Roads Page
I saw roads pages in other places, like here but I didn't like them.
I added this one at the end. I got the cars and tied the ribbon onto the underside.
Then I glued velcro to the car and to parking spots on the page.
I don't know if you can see, but I sewed the roads down with yellow lines down the middle.

Saturday, December 28, 2013

Crochet Origami Bag

So, I stumbled across this pattern on Pinterest, and I loved the concept. I'm not a big fan of crochet bags, mainly because I hate having to line them. This pattern, however, is the perfect solution. The body of the bag is worked flat - it is seriously just a rectangle. You can make is as big or as small as you want, just keep in mind that you need a specific height/width ratio to get the bag to fold up correctly. Then you can line it by sewing a flat rectangle onto your flat crochet piece! Too easy.

Once you've got your lining sewn in, you fold up the bag and seam all of 2 seams. Then you can add whatever strap you want!

I think the striping really makes this bag pop, so I did the same thing, but I also added a simple shell stitch border (skip 2 sts, 6dc, sc into next st) around the whole thing. The strap was just a single row of dc's with the same shell stitch border along both edges.

Pattern: The Masa Bag
Hook: 6.5mm
Yarn: Caron Simply Soft in Passion, Dark Chocolate, and Autumn Maize (less than 1 skein of each)
Lining: Plain cotton fabric from the quilting dept at Joann's (I bought 2 quilters quarters because the line for the cutting counters was hellacious...)

Folding Instructions Here


Sunday, December 15, 2013

Settlers of Catan Quilt


This was my first adventure into quilting, and I have to say, I am pretty proud of myself for this one! Lucky for me there are quite a few quilters in my family, so I had plenty of places to turn to for help.

If you've never played Catan, you really should check it out. Here's the game board I was working with:


I could have crochetted this project, and probably quickly too, but I loved the idea of capturing the pattern and picture of each hex. I got fabrics that really helped to accentuate the meadows, fields, and forests just like the tiles on the real game.

I did a lot of online searching for other projects, and there are quite a few other people who have done variations on this theme, but none that I fell in love with. I decided to try doing my own thing.

Each hex was 6" from side to side, with a 1/4" seam allowance on all sides. The finished quilt was 36" from side to side and 42" from corner to corner. I ended up putting little triangles around the edges so that I had flat sides to deal with when it came to adding the edging. I machine stitched the top pieces together, and then I hand-quilted it. I was planning to hand-quilt the edging on, but I was worried about it holding up to frequent washing, so in the end I machined the edging.

Ok! Here are the pictures!

Picked out the fabrics for the center!

Cut all the pieces and started assembling the top.

Top assembled, pinned out with batting and backing.

Quilting done, pinned on the edging.

DONE!