Pages

Saturday, July 21, 2012

Digital Photo Preservation Project


My cousin Renae stayed over at the end of June, and she shared with me how she's been working on a project with her family photos. Since digital wasn't widely available until we were both well into college, all of our childhood photos are physical copies, or maybe even a 35mm negative. In her case, the physical photos were stored in "cling-film" albums, which are known to discolor and warp the photos over time. She decided to remove them from their albums and scan them into a digital format, so that she could restore them and preserve them. In addition, she can arrange them into a digital scrapbook, and she can print identical copies of that scrapbook for anyone who wants one.

I've bought similar books from Shutterfly.com, and even the walgreens/rite-aid/CVS photo department can print photo books for you. I thought it was a great idea, but I didn't exactly have the tools to get started. Ok, I have the tools, I didn't have the pictures.

Back when my folks got divorced, my biological mother skipped town with all the family photo albums. The carefully selected prints all disappeared when she did. Luckily, though, she left all of the "reject sleeves". You know, back in the days before digital, when you would take 15 idential shots hoping that one of them would turn out? Right! So you get your one perfect shot, and stick the other 14 back into the paper sleeve that they came in with the little pouch for the negatives. (My apologies to anyone born after 2000 who doesn't understand any of this.)

Well, ten years ago, my sister took those "reject sleeves" and sorted them into boxes, based on what they were labelled (not that those labels were accurate) and today I got into those boxes to see what they held.


My Childhood, in 7 Boxes.

Now, these may be rejects, but they're the only photos of my childhood that I have, so my standards are a little bit more relaxed on whether or not its a "Keeper". I went through all the bins, and I've narrowed it down to probably 200 photos. I took probably 350 photos on my recent trip to Mexico, but hey, beggars can't be choosers.

I spent an hour scanning in some photos, and I've already got about 50 of them done. Its going to be a long haul to get these all digital, but it is definitely worth it.


UPDATE 7/25/12:
Scanned in about half of the total photos and posted a few select favorites to facebook. Renae and I at least are loving the memories! We also really want to get our other cousins together to re-take one of our old photos, just like this family did.

PS: We were totally cute kids!

Monday, July 2, 2012

Summer Shirt Re-Fashion

I bought this shirt on-sale a year or so ago, and even though I loved it, I knew that the way the beads had been attached wouldn't last for very long. Hand-washed carefully for a season, it did really well. Then there was Mexico.

On the way home from our trip to Mexico, the TSA searched our checked luggage, and apparently they opened a bottle of tequila that we were bringing back in order to do a chemical assay (and make sure it was really, in fact, tequila). They didn't exactly close the bottle up tight before they re-packed my bag (aka: shoved everything into it randomly) and it leaked out ALL over everything in the bag. Oh, plus that delayed the bag so it didn't even get on our flight, but anyways....

The lovely beaded shirt got thrown into the washer, with everything else from the bag...oops. Unfortunately, it did not survive its adventure through the washing machine. "But its such a cute shirt!" I thought to myself, "and its so comfy to wear in the summer!"

So, I opted to remove all the beads and start fresh. Lucky for me, the beads were sewn onto a tulle-like mesh fabric, and THAT was then stitched onto the shirt, and just around the edges. Easy-as-pie to remove it and the beads were then cut off and donated to my sister for jewelry-making purposes. I had some black, cream, and baby-pink lace-weight in the house (Aunt Lydia's Crochet Cotton Size 10) and I decided on black for better contrast. The challenge became trying to make a lace piece that fit the odd shape left behind. 


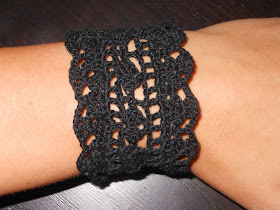
 I ended up making 5 seperate pieces that were sewn together as appliques onto the shirt. (see above left image) The center hexagon and its partner squares all came from Beyond the Square Crochet Motifs and the longer pieces are just 2 rows of dc sts with a shell border around the outside edges. I'm very pleased with how this turned out, and it gave me a great excuse to finish up another lace bracelet to match!